The Arcadion: AAC Light-heavyweight is the first 8-player raid tier introduced in Final Fantasy XIV: Dawntrail. It features four boss encounters (M1–M4) in both Normal and Savage difficulties. This guide will walk you through unlocking the raid step-by-step, preparing your gear and consumables, understanding the difficulty (and how it compares to other Dawntrail raids), recommended item levels, team composition tips, and a rundown of rewards/loot. Whether you’re a new adventurer or a seasoned raider, this guide breaks down everything in a clear, friendly way so you can dive into The Arcadion with confidence.
Unlocking The Arcadion: AAC Light-heavyweight (Step-by-Step)
To access The Arcadion raid, you’ll need to complete a short quest chain after finishing the Dawntrail main story. Here’s how to unlock each stage step by step:
Finish the Main Scenario – Complete the level 100 Dawntrail main scenario quest (MSQ). This is required before any raid content becomes available.
Travel to Solution Nine – Head to Solution Nine (a hub area introduced in Dawntrail). Locate the Stylish Stranger NPC at X:19.1, Y:18.8 on the map.
“A New Challenger Appears” Quest – Speak to the Stylish Stranger and accept the quest “A New Challenger Appears.” This kicks off The Arcadion quest line. (The Stylish Stranger will later introduce themselves as Metem during the story.)
Complete “A New Challenger Appears” – Follow the objectives for this quest (it’s mostly story setup). Upon completion, it will lead into the next quest, “The Claw in the Dark.” Make sure to pick up that next quest from Metem.
“The Claw in the Dark” Quest – This quest directly unlocks the first raid fight. After some dialogue, you’ll gain access to AAC Light-heavyweight M1: Black Cat in the Duty Finder. Congratulations – you can now queue up for the first boss!
Defeat M1: Black Cat – Clear the Black Cat encounter (either with a premade group or via Duty Finder). Once you beat the boss, return and turn in the quest “The Claw in the Dark” to Metem.
Continue the Quest Chain for M2–M4 – The raid has four “floors,” each unlocked by a subsequent quest. After M1, continue with:
- “Sweet Poison” – unlocks M2: Honey B. Lovely.
- (Story Interlude) – after M2, a quest “Yaana’s Yarn” advances the story (questgiver Yaana) and gives a materia reward. Complete it to proceed.
- “Vile Heat” – unlocks M3: Brute Bomber (given by Yaana).
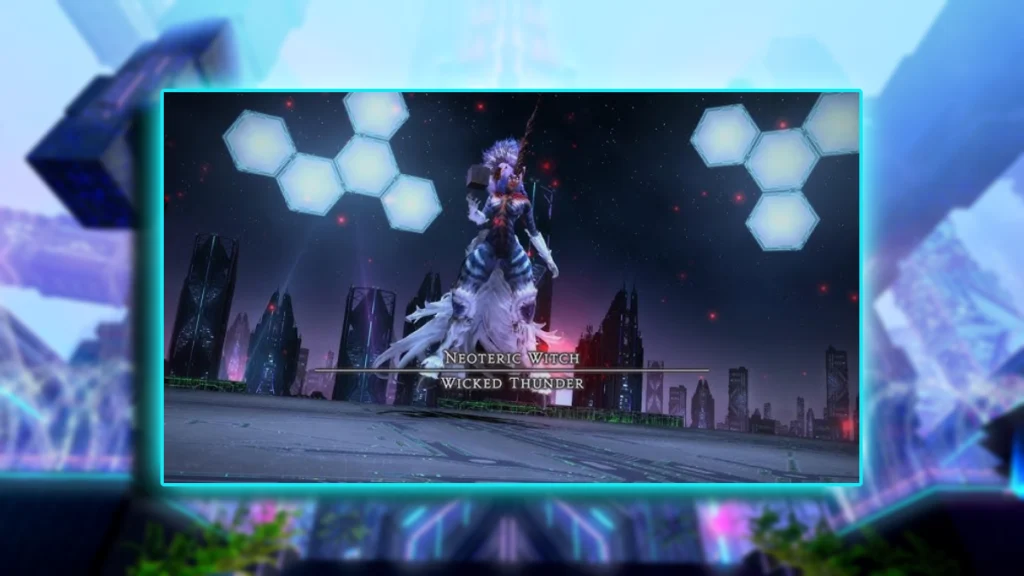
- “The Neoteric Witch” – unlocks M4: Wicked Thunder (final boss, given by Yaana).
- Each of these quests becomes available only after you’ve cleared the previous floor and seen the related story events.
Access the Raid – With each quest completed, the corresponding raid duty is added to your Duty Finder. You can now queue up for any unlocked Arcadion encounter (M1–M4 Normal). In summary, finish the quest chain from “A New Challenger Appears” through “The Neoteric Witch” to unlock all four bosses of The Arcadion: AAC Light-heavyweight.
For quick reference, here’s a breakdown of the unlock quests:
| Quest Name | Level | Quest Giver (Location) | Unlocks | Prerequisite |
|---|---|---|---|---|
| A New Challenger Appears | 100 | Stylish Stranger (Solution Nine X:19.1 Y:18.8) | Begins Arcadion quest line | Complete 7.0 MSQ “Dawntrail” |
| The Claw in the Dark | 100 | Metem (Solution Nine) | AAC Light-heavyweight M1: Black Cat | A New Challenger Appears |
| Sweet Poison | 100 | Metem (Solution Nine) | AAC Light-heavyweight M2: Honey B. Lovely | The Claw in the Dark (M1 cleared) |
| Yaana’s Yarn (story) | 100 | Yaana (Solution Nine) | (Story quest; rewards Materia XI) | Sweet Poison (M2 cleared) |
| Vile Heat | 100 | Yaana (Solution Nine) | AAC Light-heavyweight M3: Brute Bomber | Yaana’s Yarn (complete) |
| The Neoteric Witch | 100 | Yaana (Solution Nine) | AAC Light-heavyweight M4: Wicked Thunder | Vile Heat (M3 cleared) |
Note: The Normal-difficulty raids are part of the main raid story (with cutscenes after each fight). The Savage versions unlock later (and require you to have cleared all Normal modes first). For now, focus on unlocking and clearing the Normal modes to experience the story and get your initial loot. The Dawntrail Main Scenario Quest (MSQ) in Final Fantasy XIV is packed with epic battles and lengthy quest chains, which can be overwhelming if you’re short on time. Let our Buy FFXIV Dawntrail MSQ Completion Boost help you breeze through the story, unlock endgame content, and enjoy the latest expansion stress-free!
Raid Preparation Tips (Gear, Item Level, and Consumables)
Before diving into The Arcadion, you’ll want to make sure your character is geared and ready. Here are some preparation tips to help you and your party perform your best:
Minimum Item Level: The Light-heavyweight tier requires item level 685 or higher to enter via Duty Finder. This is the bare minimum – basically the gear you’d have from finishing the Dawntrail MSQ and initial endgame content.
Recommended Item Level: For a smoother run, aim a bit higher than the minimum. Item level ~690+ is recommended for Normal mode, as it gives you extra stats to handle mechanics comfortably. You can achieve this by:
- Upgrading your Artifact gear – After MSQ, you get artifact gear around i680. Augment it if possible, or mix in some dungeon drops.
- Tomestone gear – Purchase i690 gear with Allagan Tomestones of Heliometry (the new capped tomestones) once you have enough.
- Crafted gear – Consider buying HQ crafted level 100 gear from the marketboard. Crafted gear in 7.0 can be as high as i700 (and i710 in patch 7.05) when HQ, which greatly exceeds the requirement and makes even Savage fights accessible. This is a quick way to boost your average item level if you have the gil.
Savage Preparation: If you plan to challenge Savage difficulty later, you’ll want item level 700–710 on all slots to start. Savage M1 requires i700 minimum, scaling up to i710 for later fights. A common prep for serious raiders is to get a full set of HQ crafted gear (i710) pentamelded with materia before tackling Savage. This ensures you meet DPS checks and survive big hits.
Materia Melding: Meld materia into your gear, especially if you’re doing Savage. Even for Normal mode, materia can provide a nice stat bump. Focus on your job’s primary stats (e.g. Critical Hit, Determination, Direct Hit for DPS) to increase damage and healing output.
Consumables (Food & Potions): Always eat some food before the fight! HQ Food grants a 3% boost to all stats plus a hefty Vitality increase – this can be the difference between life and death on big attacks. Choose food that complements your job (e.g. Spell Speed food for casters if needed, or Crit/DH food for most DPS). Also stock up on stat potions (often called tinctures). For example, Strength DPS should bring Grade 7 Tinctures of Strength (or the highest grade available) to use during burst phases for extra damage. Healers and casters can use Mind or Intelligence tinctures respectively. These potions have a cooldown, but coordinated use during raid buffs can significantly shorten fight duration. Even in Normal mode, potions aren’t required, but using them can speed up clears and are good practice for Savage.
Repair Your Gear: It’s easy to forget – make sure to repair your gear (or have a Crafter repair to 199% durability) before going in. Raid wipes can add up in repair costs, and you don’t want broken gear mid-fight.
Echo and Buffs: (For Normal mode) If your party struggles, remember the game will grant an Echo buff after multiple wipes, increasing your HP/Damage/Healing a bit. Don’t be discouraged – learn the mechanics and you’ll get through it!
With an item level around 690-700 and proper food buffs, you’ll cruise through the Normal mode of Light-heavyweight. These prep steps will also set you up nicely for Savage if you choose to attempt it. Now, let’s look at how tough these fights are and how they compare to other content.
Difficulty Level Assessment & Comparison with Other Dawntrail Raids
The Arcadion: AAC Light-heavyweight (Normal) is fairly approachable in difficulty. Normal mode is designed for story completion, similar to previous expansion raid tiers – think of it like completing a dungeon or trial with a few more complex mechanics. Most groups clear it in Duty Finder within a try or two per boss once mechanics are understood. Wipes can happen if mechanics are ignored, but overall Normal is forgiving: you can resurrect freely and there’s no time-based enrage until very late in each fight.
In contrast, Arcadion (Savage) is where the real challenge lies, though by design the first tier of an expansion isn’t overly punishing. Here’s what players have experienced, and how Light-heavyweight compares to other content in Dawntrail:
Savage Difficulty (Light-heavyweight Tier): Overall, the community found this Savage tier more accessible than some past equivalents. Many raiders noted that the DPS checks are quite lenient – you don’t need a perfect rotation or best-in-slot gear to beat enrage on the first fights. There are also fewer “body check” mechanics (where a single mistake by one person causes instant party wipe) in the early fights. This means progression is more forgiving and you can recover from occasional errors. In fact, a lot of groups cleared the entire tier in the first week, indicating the tuning wasn’t extreme.
Comparison to Extreme Trials: If you’ve done the level 100 Extreme trials (Dawntrail’s ex primals), the Savage M1 and M2 will feel only slightly harder. One player commented that the first Savage boss isn’t significantly more difficult than Dawntrail’s extreme trials – mechanics are just a bit faster or have extra steps, but “not a massive step up from Extreme”. In other words, if you can farm the 7.0 Extremes, you’re more than ready for Arcadion Savage (at least the early fights).
Difficulty Curve Within the Tier: The four fights get progressively harder. Savage M1 (Black Cat) is intended as a gentle introduction – expect a few wipes learning new mechanics, but it’s definitely pug-friendly. Savage M2 ramps up with more complex mechanics (one or two tricky moments, but still very manageable). Savage M3 is a significant step up – players describe it as fast-paced with mechanics that will kill you (and possibly others) if failed. Savage M4, the final fight, is the real test – one player dubbed it “a whole bastard” in terms of difficulty, meaning it will demand solid coordination, memory, and DPS output. This mirrors the usual pattern: the last fight of a tier is on par with the toughest endgame content outside of Ultimate raids.
Comparison to Previous Expansions: In early interviews, the developers hinted Dawntrail’s raid difficulty might trend closer to the tougher old-school raids (Heavensward/Stormblood era). However, with Light-heavyweight, it seems they eased up a bit for the first tier. Yoshi-P has stated that since this is the first raid tier of the expansion, they didn’t want to make it too difficult, aiming for more players to clear and feel motivated for future tiers. The mechanics are unique but not overwhelmingly complex, and the DPS checks were set with some margin because job balance was still being fine-tuned in 7.0. Many groups (even relatively casual ones) were able to clear Savage Light-heavyweight within the first couple of weeks. In fact, some raiders were surprised how easy it felt – “it was very easy but extremely fun… not having body checks makes the fights very forgiving, especially with DPS checks being so lenient”. So if you found Endwalker’s early savages (like Eden or Asphodelos) a bit easy, you’ll likely find Light-heavyweight similar or even slightly easier.
Other Dawntrail Raids: Aside from the 8-man Arcadion series, Dawntrail will also have 24-man alliance raids (starting in patch 7.1) and possibly an Ultimate (a super-hard 8-man raid in 7.11). The alliance raid in 7.1 (“Echoes of Vana’diel”, if rumors are correct) will be much easier relative to Savage – alliance raids are larger scale but more casual fun, usually on par with story-mode difficulty. So, Arcadion Normal sits a bit above alliance raids in difficulty, but below Extreme trials. Arcadion Savage is the pinnacle of difficulty in 7.0 content (until the Ultimate arrives).
Future Tiers: If you’re planning ahead, know that the next Arcadion tier (Cruiserweight in patch 7.2) is expected to ramp up the challenge. The devs have hinted that the 7.2 Savage tier will include “more unique and difficult elements” for players seeking a challenge. So enjoy the relative breather of Light-heavyweight and use it as practice, because things will heat up later in Dawntrail!
In summary, The Arcadion: Light-heavyweight is very approachable in Normal mode (don’t be nervous if you’re new to raiding – you can do it!), and moderately challenging in Savage mode. It’s a great introduction to 8-player content in Dawntrail, with difficulty roughly on par with or a tad above the end of Endwalker’s raids. Experienced raiders breezed through it, but it still offers fun mechanics and a satisfying experience, especially in the later fights. If you’re coming from Extremes, jump into Savage M1/M2 with confidence – and if you’re a casual player sticking to Normal, you’ll find the fights fun set-piece battles without the frustration.
Clearing Savage Raids in Final Fantasy XIV can be a brutal challenge, requiring precise execution, high DPS, and a dedicated team. Skip the frustration and let our FFXIV Savage Raid Boost help you conquer the toughest encounters, secure powerful gear, and earn exclusive rewards with ease!
Recommended Item Level to Participate Effectively
As mentioned earlier, you need avg. item level 685 to enter the raid at all. But what item level should you really have for a smooth experience? Here are our recommendations:
Normal Mode: At least i685, but aim for i690-700+. Having a bit higher item level than the minimum will make a noticeable difference in your damage and survivability. By the time you finish the MSQ and perhaps do a few expert roulettes or buy some gear with tomestones, you should be around i690 anyway. For example, Augmented artifact gear or first-tier tomestone gear gets you close to i690-i700. Going in at i700 (if you pick up some crafted gear or fully upgrade tomestone pieces) will make the raid feel very comfortable. Remember, the gear dropped from the raid is i710 (Normal-mode Arcadion gear), so don’t worry if you haven’t reached that – the raid is designed to be beaten with slightly lower gear, and then you collect the i710 pieces as rewards.
Savage Mode: At least i700 on average. Savage first floor requires i700 and the later ones i705-710 minimum to enter. In practice, most groups try to be i710 across the board before serious progression. This is achievable in Week1 by equipping HQ crafted gear in every slot (i710) and melding it. If you can’t get full crafted, then a mix of augmented tomestone gear (usually augmented to i700) plus some crafted pieces will do. Essentially, being i700 or above ensures you meet all DPS checks comfortably assuming solid play. If you enter Savage with only i685-690 gear, you’ll likely struggle to meet enrage even if you execute mechanics well. So invest some time in gear prep – it pays off.
Why Item Level Matters: Each 5 or 10 item levels is a significant stat increase in FFXIV. For DPS jobs, this means more damage (faster clears, easier to beat tight mechanics). For tanks and healers, higher item level means higher HP and healing output, giving more room for error on heavy-hitting attacks. For example, going from i680 to i700 can easily be a 10-15% increase in throughput. That could be the difference between surviving with a sliver of health versus dying, or hitting enrage versus defeating the boss before the timer.
In short, don’t skimp on item level. If you just meet 685, consider doing a few upgrades first. The fights are doable at minimum ilvl, but having that extra buffer makes learning mechanics much more forgiving. And if you plan to do Savage, treat i700 as your personal minimum goal.
(One more tip: if you are below i690 and eager to try the raid, you can join with a pre-made party. The Duty Finder enforces the item level, but a full party can enter undersized content via Party Finder with the “minimum ilvl restrictions lifted” – though this is more common for Savage practice with trusted groups. Generally, just gear up; Dawntrail gives plenty of access to 690+ gear early on.)
Team Composition Strategies for an Optimal Clear
The Arcadion raids require an 8-player party: 2 tanks, 2 healers, and 4 DPS. While any composition of jobs that fits these roles can clear the content (especially Normal mode which is not super strict), certain setups and synergies are considered “optimal” or at least make life easier. Here’s some advice on team comp and job roles:
Tanks (2) – One tank will usually “main tank” the boss (holding aggro), and the other is the “off-tank” who helps with mechanics, adds, or tank-buster soaking as needed. Any tank job works, so play what you’re comfortable with. An optimal pairing often includes one tank with strong party mitigation and self-healing (e.g. Warrior or Paladin) and another with high damage or utility (e.g. Gunbreaker or Dark Knight). For instance, a popular combo is WAR + PLD – the Warrior can use Holmgang and massive self-heals to survive big hits, while Paladin provides party shields (Divine Veil) and can cover the other tank if needed. But you could just as well do GNB + DRK for maximum DPS output; just coordinate cooldowns. The key is communication: decide who will take which tank buster (some fights have dual tank-busters requiring both tanks to step up simultaneously). In Light-heavyweight, tank-busters aren’t too crazy in Normal mode – usually just heavy hits or shared stacks. In Savage, be ready for mechanics like “Knuckle Sandwich” in M3 (a double tank stack hit) which require both tanks to stack together and use cooldowns. Tip: Mark one tank as main tank in waymarks, and establish a provoke/shirk swap plan for things like tank swap mechanics. Tanks should also contribute damage when they can, so an optimized tank duo will try to stay in DPS stance (no damage penalty) as much as possible and only tank-swap when required.
Healers (2) – Typically one “pure” healer (White Mage or Astrologian) and one “barrier” healer (Scholar or Sage) is recommended. This balance gives you both strong raw healing and shields to absorb damage. For example, White Mage + Scholar is a classic pairing: the WHM pumps out big heals and regen effects, while SCH places shields (Galvanize from Adloquium) and mitigation (Sacred Soil) to soften raid-wides. Astrologian + Sage is another great combo – AST provides healing and buffs (and can sect into shields if needed), Sage provides continuous shielding and decent DPS. That said, any healer combo can clear Normal (even two of the same is fine). If you’re struggling, a barrier healer’s shields can prevent a lot of damage in these fights (e.g. Sage’s Eukrasian Prognosis before a raid-wide). An optimal strategy is to coordinate healer cooldowns: don’t both use your big healing buffs on the same raid-wide. Instead, stagger abilities like WHM’s Temperance and SCH’s Expedient on different hits. Also, share the responsibility: one healer handles one set of mechanics (like one does first raid-wide heal, the other does second, etc.). Many mechanics in Arcadion have damage over time debuffs or repeated hits, so healers should be ready with AoE heals and esuna if necessary. (For example, Honey B. Lovely has a charm mechanic that might distract players and cause extra damage – healers need to cleanse or heal through it.) In Savage, healer DPS contribution starts to matter too; optimized healers will weave in attacks when healing load is light. Tip: Pre-cast shields or HoTs before big hits (you’ll learn when those come as you prog), and communicate with your co-healer on who uses big cooldowns when. Light-heavyweight Savage was considered a “healer-friendly” tier due to modest healing requirements, so a well-coordinated healer duo can even squeeze in DPS potions to help meet checks.
DPS (4) – A balanced DPS lineup can greatly enhance your party’s damage via buffs. A common optimal comp is 1 melee DPS, 1 ranged Physical DPS, 1 caster DPS, and a flex slot for either a second melee or second caster. This ensures you get the unique party buff each role brings (melees often have party crit buffs or damage buffs, ranged support have damage buffs and mitigation, casters bring magical damage and utility). For example, one optimal setup could be: Dragoon, Ninja, Bard, Black Mage. Here you have:
- Dragoon (melee) providing Battle Litany (crit% buff) and high personal DPS.
- Ninja (melee) providing Trick Attack (party damage buff) – very valuable, plus great burst.
- Bard (ranged) providing Foe Requiem / Radiant Finale (damage buffs) and Mitigations like Troubadour, plus it can move freely to handle mechanics.
- Black Mage (caster) providing massive personal DPS (no party buff, but the other jobs cover that) and the standard caster Limit Break if needed. This is just one example; there are many viable comps. Reaper or Samurai could fill that melee slot instead of DRG/NIN (Reaper has a party damage buff too, Samurai has pure high DPS). Dancer is a fantastic ranged choice as well – it has arguably the best party damage buff (Dance Partner and Technical Step) which can boost a strong DPS ally, and also brings raid mitigation. If you bring a Dancer, pair them with a high-output partner (like a Samurai or Black Mage) for maximum effect. Machinist is more selfish (no big party buff), but its personal DPS is high and it’s perfectly fine for these fights if played well. Summoner or Red Mage are excellent caster options if you value utility – both have resurrect spells which can be lifesavers in progression. In fact, having a Red Mage in early clears is often recommended because they can Swiftcast+Raise multiple times and also do decent burst damage (and buff via Embolden). Pictomancer (new caster job) also brings strong damage and some party utility – early reports show Pictomancer’s DPS was very high, so including one could trivialize DPS checks (devs even had to adjust other jobs upward because Pictomancer was an outlier!). So don’t shy away from bringing the new job if someone enjoys it.
Party Synergy: The goal of an optimal comp is to cover all your bases – mitigation, healing, and maximizing damage through buffs. Light-heavyweight does not force any strict class requirements (e.g., you don’t need a specific debuff or limit break like you might in some ultimates). But consider:
- At least one job with a party damage buff (NIN, DNC, BRD, RPR, AST etc.) so you can burst down phases faster.
- At least one physical ranged (BRD/DNC/MCH) for the Tactician/Troubadour/Shield Samba party shield – these come in handy for heavy AoE hits. While not mandatory, that extra mitigation can save a wipe if healers are strained.
- A mix of damage types – having both physical and magical damage dealers can be useful (some fights might be slightly easier on one or the other due to buffs, e.g. Bard’s buff affects magical too, Ninja’s Trick affects all damage).
- Melee Limit Break vs Caster Limit Break: In raids, typically a Level 3 Limit Break from a melee (like the classic “LB3 the boss at low HP”) does the most damage to a single target. So having at least one melee DPS in the party ensures you can LB3 the boss if you hit enrage or need a big finish. If you had no melees, you’d rely on a caster LB3 (which is an AoE hit, usually less boss damage) or a ranged LB3 (even weaker on single target). So, for optimal damage, try to include a melee DPS who can handle LB duties. Conversely, if a fight had multiple targets (not really the case in Light-heavyweight – each floor is basically a single boss), a caster LB might be useful, but here melee LB is king for final phase burst.
- Utility picks: Don’t underestimate the value of utility. A Red Mage who can dualcast Verraise to pick up fallen party members can turn a would-be wipe into a clutch clear. A Bard can use Warden’s Paean to cleanse a status or Troubadour to reduce incoming damage during a big mechanic. These little things can make your run much smoother, especially while learning.
Communication and Strategy: Regardless of comp, discuss with your party how you’ll handle certain mechanics. For example, if your group has a Ninja, plan raid burst around their Trick Attack debuff window (everyone save big hits for when Trick is up on the boss). If you have a Dancer, decide who gets the Dance partner (likely the highest constant DPS teammate). If you have multiple melee, assign who takes which position if a mechanic requires spreading (e.g. “north/south” for one, “east/west” for the other). The Light-heavyweight fights often have mechanics where players must split into light parties or pairs – decide these pairings in advance (like “Tank+Healer pairs” or a specific DPS with a specific support). Good team synergy and planning often matters more than the exact job composition.
Flexibility: Finally, “optimal” doesn’t mean “required.” It’s better to play jobs you’re skilled at than to force a meta comp that people are uncomfortable with. All jobs in FFXIV are viable. The difference between a meta comp and a random comp in Normal mode is negligible. Even in Savage, player skill and knowledge of mechanics far outweigh job choice. For example, world-first groups cleared Savage with varied comps; some ran double melee, some included less common picks like Blue Mage (in synced content for fun). So don’t stress too much – as long as you have the required 2/2/4 role split and everyone knows their job, you can clear Arcadion just fine.
Summary: Aim for a balanced party (2 tanks, 2 healers, 1-2 melee DPS, 1 physical ranged DPS, 1-2 casters). Utilize party buffs and mitigation tools those jobs provide. Coordinate on who handles mechanics and cooldowns. And most importantly, play with a team that communicates – call out mechanics, use waymarks if needed (e.g., mark where to stack for a mechanic), and support each other. That will lead to an “optimal clear” more than any specific job combo. Good teamwork turns even a mediocre comp into an unstoppable force!
Boss Mechanics Overview (Light-heavyweight Tier Encounters)
Each of the four fights in The Arcadion has its own flavor and mechanics. Below is a quick overview of each boss and their notable mechanics. This isn’t a full strategy guide, but it highlights what to watch out for in each encounter:
| Floor (Boss) | Notable Mechanics & Tips |
|---|---|
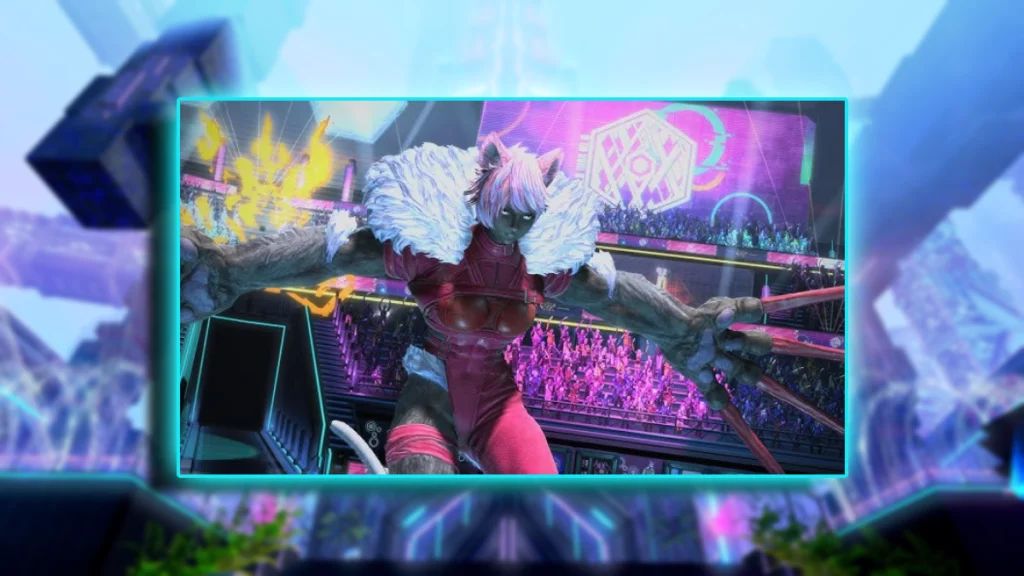
| M1: Black Cat 🐈 | Double/Quadruple Swipe – The boss unleashes rapid cleaving strikes that require players to position carefully. The arena will often be split into two light parties or partner pairs; for example, Double Swipe targets two players who should be paired with partners to share damage, and Quadruple Swipe hits multiple players requiring everyone to spread into four pairs. Grimalkin Gale – A wind-based attack that knocks players back (a “gale” from the black cat!). Use knockback resistance or position yourself so you won’t be knocked off or into danger. Tip: Mark two stack points for Swipe mechanics (usually A/B markers) so that the party knows where to group or spread. Black Cat also uses standard raid-wide AoEs and a tank-buster claw attack – nothing too punishing if mitigated. Overall, focus on partner coordination for the swipes and you’ll be fine. |
| M2: Honey B. Lovely 🐝 | Infatuation (Heart Gauge) – Honey B. Lovely charms the raid with a unique heart mechanic. Throughout the fight, certain attacks give players “❤” stacks (represented by hearts over your head). If anyone reaches 4 hearts, they become Charmed/Stunned and the boss heals herself (~1% per person charmed)! So the goal is to avoid or minimize getting those hearts. She’ll do moves like Love Me Tender (spread-out markers that, if they hit you, add a heart) and Loveseeker (slow-moving heart projectiles you must dodge) to tempt you. Pay attention to these and don’t greed damage at the cost of extra heart stacks. Splash of Venom / Drop of Venom – These paired mechanics cause parts of the arena to be covered in poison puddles. One will leave exploding puddles you must move away from, and the other might force a stack or spread while dealing with the puddles. Essentially, dodge the goo and regroup when needed. Alarm Pheromones – Summons adds called “Groupbees” (think of them as her backup dancers/fans). Handle these adds quickly (they might target a quarter of the arena – move to the safe side and AoE them down). Tip: Save an AoE LB or strong AoE skills for the add phase if you fall behind on DPS. Tank Note: Honey B. has a frontal cone tank-buster called Honeyed Breeze – face her away from the group and use a cooldown. Healer Note: Watch out for Honey B. Live, a raid-wide that also triggers the start of the charm phase, so be ready to heal and then handle hearts. This fight is all about multitasking: avoiding sweet temptations (hearts and puddles) while keeping up DPS. |
| M3: Brute Bomber 🤜💥 | Wrestling Arena Mechanics – Brute Bomber brings a pro-wrestling flair, complete with explosive gadgets. Brutal Lariat – The boss will jump to an edge and swing his arm in a wide 270° arc, covering most of the arena except a small slice. The trick is to see which arm is glowing/outstretched and run to the opposite side quickly to avoid the huge swipe. Getting hit will stun you (and likely knock you out of the arena in Savage). Barbarous Barrage – A series of four knockbacks in succession. He’ll spawn bombs or markers that knock everyone away from them. Position yourself in such a way that each knockback pushes you into a safe zone (typically you stand near the center for the first, so you don’t get knocked off the platform, then adjust for subsequent ones). In Normal mode this is forgiving; in Savage you’ll actually need to purposefully use knockbacks to move into safe spots. Fuses of Fury – Brute Bomber plants several bombs with varying fuse lengths. Some bombs have a short fuse (will explode first) and others have a long fuse. The rule is: stand near a long-fuse bomb (safe while the short-fuse ones explode), then quickly move into the spot where a short-fuse bomb just blew up (that spot will be safe when the long-fuse ones go off). This tests group positioning and reaction – call out “short then long” or similar. Doping Drought (Phase 2) – Mid-fight, he’ll chug a concoction (going “super saiyan” wrestler mode) which powers up his attacks. After this, expect double Lariats (he can do two back-to-back, possibly even from the same side, so don’t assume one from each side – he might mix it up), and upgraded Fire Spin attacks (rotating flame AoEs you must continually dodge by moving around him). Brutal Burn is a stack marker on a player (group up to share) and Knuckle Sandwich is a double tank-buster that requires both tanks to stack together and share damage (use big cooldowns here). Tip: Treat this fight like a choreographed wrestling match – once you learn his “moves” (they have telegraphed tells, like the glowing arm for Lariat, or the fuse lengths for bombs), you can anticipate and counter them. It’s one of the more movement-intensive fights. Keep your eyes peeled and feet ready to move! |
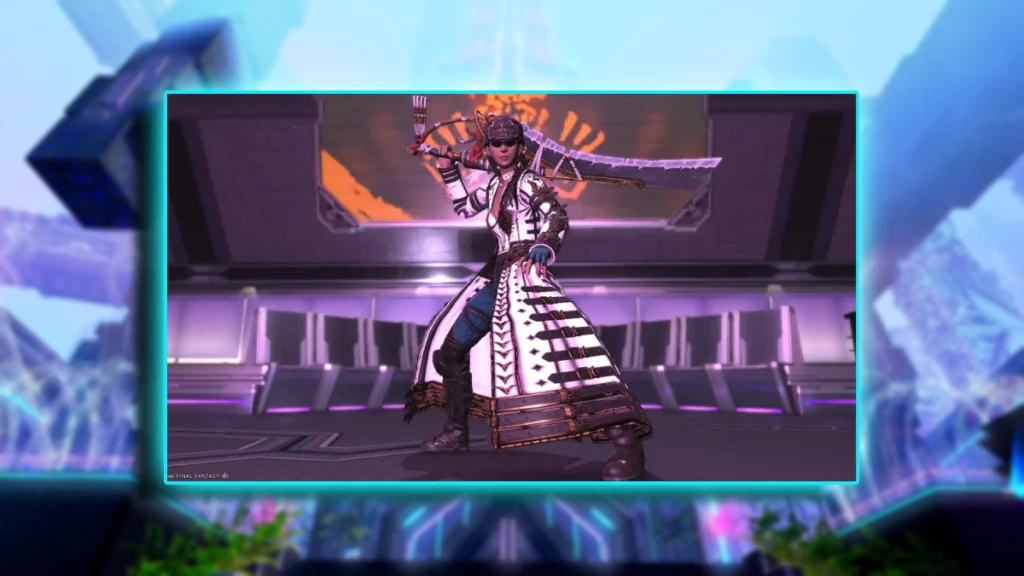
| M4: Wicked Thunder ⚡ | Clash of Thunder and Tech: Wicked Thunder is the final boss and she mixes magical thunder attacks with a high-tech gun show. This battle has two phases (“Guns Out” and “Wings Out”). Wrath of Zeus – Frequent raid-wide AoE blasts (healers be on point with mitigation and heals). Sideways Spark – A half-arena cleave: she’ll swing a large thunder-infused weapon (or arm) to one side. Safe side is indicated by which hand or cube she’s using – look at her stance. If her cube (gun) is in her right hand, the right half of the arena is about to be blasted, so run to the left (and vice versa). Shadow’s Sabbath – She will summon clones of herself that repeat certain attacks. For example, clones might appear and each do a Sideways Spark from their position, meaning you’ll have to dodge multiple directions (usually by moving to a safe spot not covered by either clone’s attack). This essentially layers mechanics – pay attention to clone spawns and their casts. Wicked Jolt – A heavy tankbuster on the main tank (use cooldowns, and tank-swap if you see a debuff). Stampeding Thunder (Electrope Gun) – At one point she pulls out her special weapon – a gun named Electrope. Instead of a simple half arena, she will target an entire 3/4 of the arena in a pattern. Here’s how it works: She positions at an edge and fires the gun, which covers the row/column she’s in and adjacent ones, leaving only a quarter of the arena safe. This 75% area is blasted multiple times (you MUST not be in it or you’ll likely die). To handle this, move to the safe quadrant immediately. Then, she will telegraph the order in which the remaining safe area will be blasted: look for markers or the gun’s orientation to see which section will get hit first, second, etc.. This becomes a dance of moving between two safe spots: e.g., stand in the only safe quarter, then when that’s about to get hit, move into the part that was just hit and is now safe. This sequence is often called Fivefold or Threefold Blast (depending on how many blasts) in the community. It’s the marquee mechanic of the fight – once you master this “dodge the repeated gun blasts” part, you’ve done the hardest bit. After the shooting gallery, she usually follows with Wicked Bolt – a multi-hit stack marker on the party (everyone stack and don’t move until all hits are done; it’s like Bahamut’s Akh Morn with several consecutive hits). In Phase 2 (Wings Out), Wicked Thunder amps it up: she sprouts electrified wings and uses new attacks. Bewitching Flight will trace lightning along the arena’s lines or pattern (you’ll see electricity drawing paths – don’t stand on those paths). Wicked Hypercannon might target a line AoE or a specific pattern requiring a spread. Clones come back via Witch Hunt, tracing paths from the center outward (imagine mirror images doing line attacks across the arena) – you’ll need to weave between these sweeping beams. Many of these phase 2 mechanics boil down to “find the safe slice” – get between two linear AoEs, or off to one corner, etc., as multiple AoEs go off. Tip: Use the arena markings (if any grid or patterns on the floor) to help position precisely. Healers should be ready in phase 2 – damage comes rapid-fire, and missing a clone mechanic can mean multiple people with vulnerability debuffs taking hits. This fight is considered the most challenging, especially in Savage where enrage is ~13:30 with very high DPS requirement. But in Normal, you have more leniency. Focus on survival over greed – dodging her large AoEs and resolving mechanics correctly is the priority. Once comfortable, push damage in the quieter moments. Clearing Wicked Thunder’s encounter will conclude the Light-heavyweight raid storyline, so enjoy the finale! |
As you can see, each boss in the Light-heavyweight tier has its own gimmick: Black Cat tests your coordination with partner mechanics and knockbacks, Honey B. tests your discipline with avoiding debuffs (hearts) and area denial (puddles), Brute Bomber tests spatial awareness and movement, and Wicked Thunder tests complex pattern recognition and quick repositioning. Mechanics build on each other – so by the time you face Wicked Thunder, everything you learned in earlier fights (stacking, spreading, dodging, reacting to multiple AoEs) will come into play.
For Normal mode, mechanics will be telegraphed and a bit forgiving (getting hit might hurt but not one-shot you unless it’s a really major move). In Savage, many of these mechanics have less warning or happen faster/back-to-back, so consider Normal mode your training ground to master the basics.
One more note: Use raid markers and chat to strategize. For example, before pulling Honey B. Lovely, decide on positions for spreading out the “Love Me Tender” markers (maybe assign clock positions to each player). Before Brute Bomber, mark where to bait knockbacks or stack for burns. These pre-plans turn chaos into something you can manage.
Rewards and Loot Table
Clearing The Arcadion: AAC Light-heavyweight will net you a variety of rewards each week. Both Normal and Savage modes have their own loot systems:
Normal Mode Loot (Tokens and Gear)
In Normal mode, bosses do not drop direct gear. Instead, each boss drops treasure coffers containing tokens. You then trade these tokens in for the gear piece of your choice. This allows you to eventually collect a full set of raid gear (called the “Light-heavy” gear set) without relying on pure RNG for specific drops.
You can receive one token per boss per week (the loot is on a weekly lockout). That means each raid floor can be looted once a week. The lockout resets every Tuesday, at which point you can run again for more tokens.
Each boss’s coffer typically contains two tokens of a specific type (and sometimes an accessory token). All 8 players roll Need/Greed on them. If you win one, that’s your loot for the week from that boss. (If you don’t win anything, you can try again that week until you do, but once you obtain a piece from that boss, you’re capped for the week for that boss.)
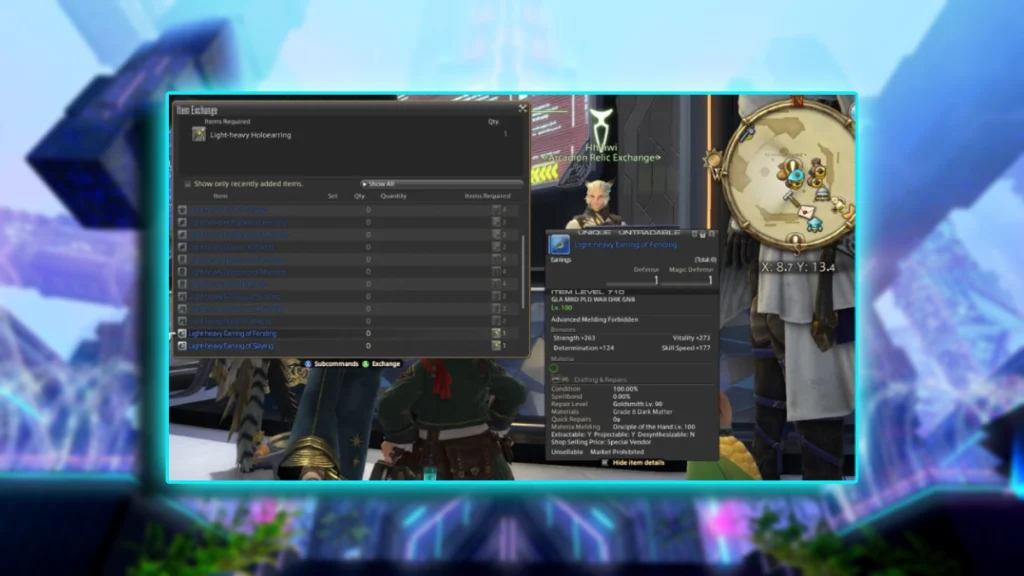
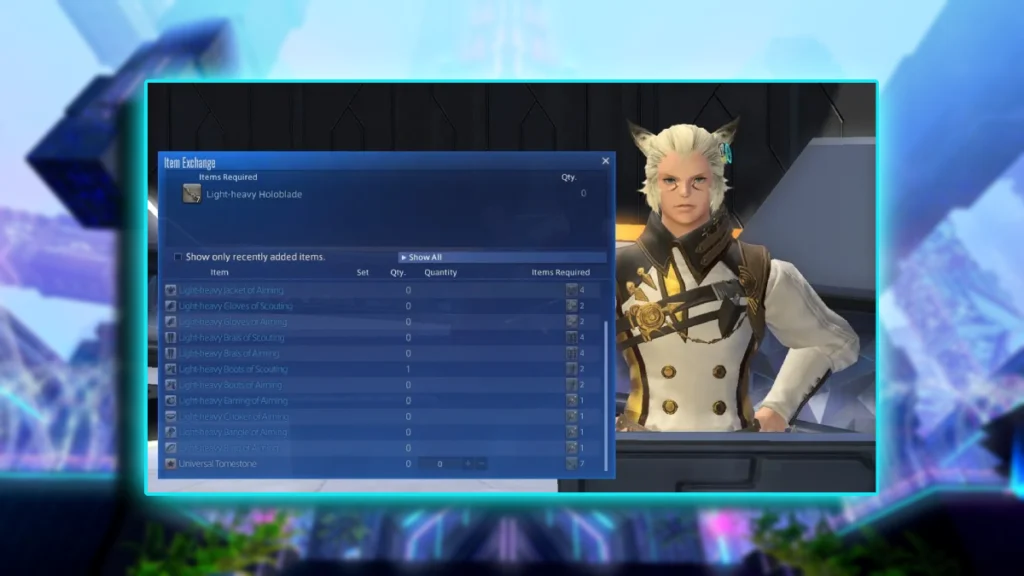
Token to Gear Exchange: After collecting enough tokens, head to Hhihwi in Solution Nine (X:8.7, Y:13.4) – this NPC handles raid gear exchanges. Here’s the breakdown of how many tokens you need for each gear slot:
| Gear Slot | Tokens Required | Token Name | Drops from |
|---|---|---|---|
| Weapon (requires special item, see below) | – | – | (See Weapon section below) |
| Head | 2 | Light-heavy Holohelm | M1 and M2 coffers |
| Body | 4 | Light-heavy Holoarmor | M3 and M4 coffers |
| Hands | 2 | Light-heavy Hologauntlets | M2 and M3 coffers |
| Legs | 4 | Light-heavy Holochausses | M3 and M4 coffers |
| Feet | 2 | Light-heavy Hologreaves | M1 and M4 coffers |
| Accessories (Ring/Earring/Necklace/Bracelet) | 1 each | Light-heavy Holoearring (represents any accessory) | M1, M2, M3, M4 (all drop accessory tokens) |
Token drop info: Each boss in Light-heavyweight drops a different set of tokens:
- Black Cat (M1) – drops 2 accessory tokens and 2 head tokens (Holohelms).
- Honey B. Lovely (M2) – drops 2 accessory tokens and 2 hands tokens (Hologauntlets), and sometimes 1 head token.
- Brute Bomber (M3) – drops 2 accessory tokens, plus 2 legs tokens (Holochausses) and 1 head, 1 hands token.
- Wicked Thunder (M4) – drops 2 accessory tokens and 2 body tokens (Holoarmor) and 1 feet token.
(The exact distribution can be a bit confusing in text, but essentially by clearing all four each week, you’ll accumulate the variety of tokens needed. For instance, to buy a chest piece you need 4 Holoarmor tokens – which come from M3 and M4 over two weeks. To buy legs, you need 4 Holochausses – also from M3/M4 over two weeks, etc. Accessories are easiest – each clear of any fight gives a Holoearring token, and you only need 1 per accessory, but you’re limited to one accessory per week since you can only loot one token per boss per week.)
Gear Stats: The Light-heavyweight gear obtained is item level 710 for armor and accessories. These pieces are very strong for the 7.0 tier – they are on par with the first tomestone gear set and will set you up for 7.1 and Savage progression. In fact, the weapon from this tier is ilvl 715 (five levels higher than the armor), making it best-in-slot until Savage weapons or later patches.
Weapon Acquisition: The final boss Wicked Thunder (M4 Normal) does not drop a weapon directly, but each week it drops a Lightheavy Holoblade item (one for each player, as a bonus reward). You need 4 Lightheavy Holoblades to purchase a Universal Tomestone. The Universal Tomestone can then be traded (also at Hhihwi in Solution Nine) along with 500 Tomestones of Heliometry for your weapon of choice. In short:
- Clear M4 Normal each week to get 1 Holoblade (up to 4 weeks).
- After 4 clears (4 Holoblades), turn them in for the raid weapon token.
- Spend 500 tomes (which is half the tome cap of 2000, so about 2 weeks of capping tomes) to buy the weapon.
- This gives you a shiny ilvl 715 raid weapon 😄.
This system is similar to previous expansions: it ensures everyone can eventually buy a weapon after a few weeks, even if the weapon itself isn’t a direct drop.
Completion Bonus: The first time you clear each floor in a given week, you’ll also get some Allagan Tomestones (20 of the uncapped Aesthetics and 10 of the capped Heliometry per boss in Normal). This is a nice bonus to help you buy other gear.
TL;DR: Do the raid each week, win tokens, and trade them for gear upgrades. Focus on getting your accessories first (since those only cost 1 token each – you could technically get up to 4 accessories in one week if you won the drops from each boss, though loot roles are random), then target bigger pieces like body/legs which take multiple weeks. Many raiders prioritize weapon (via Holoblades) > body/legs > head/hands/feet > accessories, but accessories are the quickest immediate boost if you’re starting fresh.
Below is a summary table of the token-to-gear exchange for clarity:
| Item | Token Name | # of Tokens Required | Obtained from |
|---|---|---|---|
| Head Armor | Light-heavy Holohelm | 2 tokens | M1 Black Cat (drops 2 per coffer) |
| Body Armor | Light-heavy Holoarmor | 4 tokens | M4 Wicked Thunder (drops 2 per coffer) |
| Hand Armor | Light-heavy Hologauntlets | 2 tokens | M2 Honey B. Lovely (drops 2) |
| Leg Armor | Light-heavy Holochausses | 4 tokens | M3 Brute Bomber (drops 2) |
| Feet Armor | Light-heavy Hologreaves | 2 tokens | M4 Wicked Thunder (drops 1, M1 drops 1) |
| Accessories (Earring, Necklace, Bracelet, Ring) | Light-heavy Holoearring | 1 token each | All bosses (each drops 2) |
| Weapon | Universal Tomestone + 500 tomes | 1 token (Tomestone) + 500 Tomes | 4 Holoblades = 1 Tomestone (Holoblades from M4 clears) |
(Note: The above “Obtained from” refers to which boss’s coffer contains that token type in Normal mode. You only get one token per boss per week though!)
By week 8 of the tier, even the unluckiest player can have every piece including weapon, due to token pity system. So gear up at your own pace.
Ultimate Raids in Final Fantasy XIV are some of the hardest challenges in the game, demanding flawless execution and hours of practice. Skip the struggle and secure your clear with our Buy FFXIV Ultimate Raids Boost, so you can earn exclusive titles, weapons, and achievements without the grind!
Savage Mode Loot
If you venture into AAC Light-heavyweight (Savage), the loot system changes a bit:
- Savage bosses drop coffers that turn into gear for your job (e.g., a chest coffer that anyone can open and it becomes a chest piece for their current job). Additionally, Savage drops upgrade materials for tomestone gear (like Moonshine Brine, etc.), and the final Savage boss drops a unique weapon coffer + a mount.
- Specifically, clearing each Savage floor yields Savage tokens (different from Normal tokens) that can also be exchanged for Augmented Light-heavy gear (i730 gear). And the final Savage (M4S) typically drops a guaranteed weapon coffer and a random Savage-exclusive mount.
- In Light-heavyweight Savage, players who cleared noted that aside from the item upgrades, a special mount can drop – presumably a cool unique mount themed after the raid. Only those who defeat Wicked Thunder (Savage) get a shot at this mount, which you roll for. (Expect something flashy – perhaps a thunder-themed mount or a championship belt look, who knows!)
- Savage also awards a title on clearing the last floor, and an achievement. So if you want prestige, that’s the way to go.
However, since this guide is mainly about unlocking and normal clear, we won’t dive too deep into Savage loot details. Just be aware the best gear (i730 weapons, etc.) come from Savage, and you can also get a mount and title as bragging rights.
Other Rewards (Minions, Mounts, Collectibles)
The Arcadion raid tier also offers some fun collectibles:
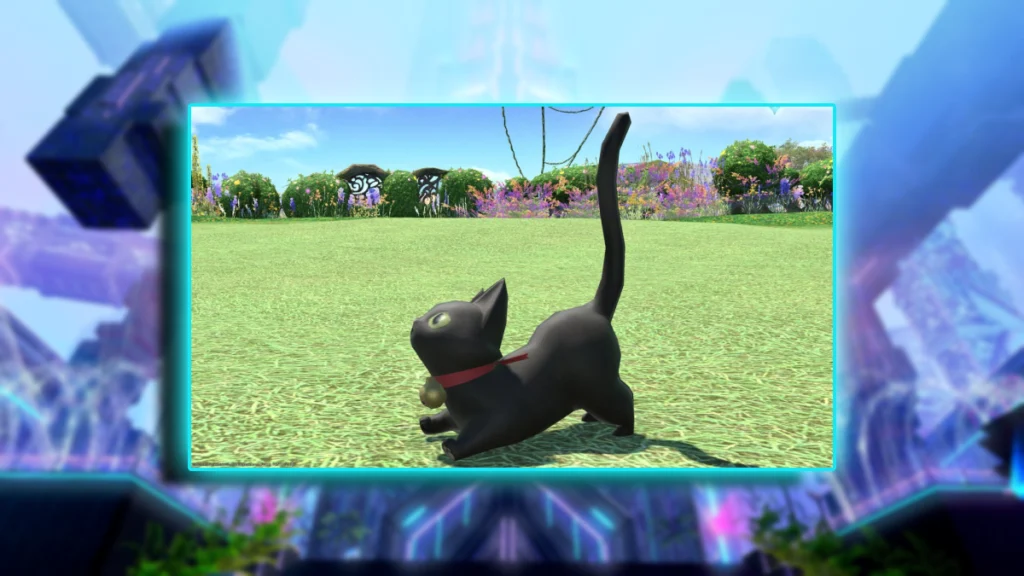
Minion: A Black Kitten minion (very likely a mini version of the Black Cat boss) can drop from the final encounter. There is a chance to obtain the Black Kitten after clearing AAC Light-heavyweight M4. This is a cute little black cat minion – a nice nod to the first boss. It’s not a guaranteed drop; usually one might drop for the whole party and you’ll roll on it if it appears.
Orchestrion Rolls: Each fight has its own battle theme music, and you can collect those songs for your orchestrion:
- “It’s Showtime!” Orchestrion Roll – Chance to drop from M1 Black Cat.
- “Bee My Honey” Orchestrion Roll – Chance from M2 Honey B. Lovely.
- “Burning Souls” Orchestrion Roll – Chance from M3 Brute Bomber.
- “Give It All” Orchestrion Roll – Chance from M4 Wicked Thunder (this song is a banger – the community loved the raid’s final boss theme). These are random drops; typically each boss’s coffer can drop its roll. If you’re farming for them, you might need multiple clears. (Good news: in Normal mode you can re-clear as often as you like for music/minions as long as you don’t need loot. Even after you’re loot-locked, you can still run for fun and roll on these extras since those usually aren’t weekly restricted.)
Triple Triad Cards: For the Triple Triad aficionados, there are new cards:
- The Black Cat card can drop from M1.
- (Likely Honey B., Brute Bomber, Wicked Thunder cards exist too, often the first and last boss have them.) The Thonky list shows Black Cat’s card from M1; it’s possible Wicked Thunder or others drop from later fights or from achievements. Collect all raid boss cards to build out your deck!
Mount (Normal mode): Unlike some previous raid series (like Alexander or Omega which had mounts for final Savage clears), the Normal mode of Arcadion doesn’t directly give a mount. The mount is tied to Savage clears as mentioned. So if you only do Normal, you won’t miss any mount except the kitten minion (the kitten is a minion, not a mount).
Achievements/Titles: Clearing each floor of Normal grants achievements (like “Light-heavyweight I” for M1, etc.). Clearing all of them might grant a title or just an achievement. The big titles usually come from Savage (for example, a title like “Light-heavy Legend” or something could be for full Savage clear – check your Achievement UI after clearing to see).
Tomestones: As noted, you’ll earn Allagan Tomestones of Aesthetics and Heliometry for each clear, which speeds up getting other gear. It’s a nice supplementary reward (people often cap their weekly tomes by doing raids).
Gil and Materia: Disenchanted (desynth) raid gear might yield some materia or items, and you can also get materia from the quest Yaana’s Yarn in the unlock chain. Additionally, when the tier is no longer current in future patches, the weekly lockouts might be removed and you could potentially farm and sell loot, but that’s far ahead.
To sum up the loot: Each week you can get up to 4 tokens (one per boss) which you trade for ilvl 710 gear, plus 1 blade toward your weapon, plus any bonus roll items like orchestrion rolls, minion, card. Over 4 weeks you’ll get a weapon, and over several weeks you can deck out in full gear. Savage players will get even stronger ilvl 730 gear and a shot at a mount.
Here’s a quick loot drop breakdown in table form for Normal mode:
| Boss | Token Drop | Trades For | Bonus Drops |
|---|---|---|---|
| M1 Black Cat | 2× Holohelm (Head token), 2× Holoearring (Accessory token) | Head gear (need 2 tokens), Accessories (need 1 token each) | It’s Showtime! Orchestrion Roll (rare); Black Cat Triple Triad Card (rare) |
| M2 Honey B. | 2× Hologauntlets (Hands token), 2× Holoearring (Accessory token), + sometimes 1 Holohelm | Hand gear (need 2 tokens), Accessories (1 each). (Head token also drops here in small amount) | Bee My Honey Orchestrion Roll (rare) |
| M3 Brute Bomber | 2× Holochausses (Legs token), 2× Holoearring (Accessory token), + sometimes 1 Holohelm & 1 Hologauntlets | Leg gear (need 4 tokens, so 2 weeks), Accessories. (Also minor head/hands tokens drop) | Burning Souls Orchestrion Roll (rare) |
| M4 Wicked Thunder | 2× Holoarmor (Body token), 2× Holoearring (Accessory token), + sometimes 1 Hologreaves (Feet token) | Body gear (need 4 tokens, ~2 weeks), Feet gear (need 2, might get in 2 weeks), Accessories. | Give It All Orchestrion Roll(rare); Lightheavy Holoblade (1 per player, weekly); Black Kitten Minion (rare chance) |
And here’s the Savage extras (for completeness, though this guide is focused on Normal):
- Savage M4 (Wicked Thunder) – Drops i730 chest coffer, i730 weapon coffer (one of these may drop per clear), a Wicked Thunder mount (rare drop), and a Wicked Thunder Triple Triad card (likely). Also Savage tokens for gear and a blade item for weapons if needing pity.
As you defeat bosses, don’t forget to enjoy the rewards! Wearing your new Light-heavy gear not only boosts your power but also looks pretty stylish (the armor designs in this tier have a cool high-tech/gladiatorial aesthetic). And blasting the orchestrion music in your house will let you relive the epic themes of The Arcadion.
Final Tips
Practice Makes Perfect: Don’t be afraid to queue up for Normal mode multiple times to practice mechanics, even after you’ve gotten your weekly loot. This is especially useful if you plan to do Savage. The more comfortable you are with say, Honey B’s heart mechanics or Brute’s bomb patterns, the easier the Savage versions (with added complexity) will feel.
Watch Community Guides/Discussions: The FFXIV community is fantastic at sharing strategies. Check out video guides on YouTube (MrHappy, Hector Hectorson, etc., have quick visuals for each fight) or read discussion threads on Reddit for each boss. For example, if a particular mechanic is giving you trouble, you might find a simple mnemonic or strategy players use (like a specific safe spot or a positioning trick). Reddit’s r/ffxiv often has “Raid Day Megathreads” where people share tips and solutions – worth a read if you’re progging Savage, or even Normal. Insight: Many players noted that staying calm and focusing on the basic mechanics is key – once you’ve seen everything once, it “clicks” and the fight becomes much easier on subsequent attempts.
Join a Learning Party: If Duty Finder is too chaotic, consider using Party Finder to form or join a group that’s learning the fight. You can set up a group specifically for, say, “Practice M4 mechanics (Normal)” or join one of the many “clear party” groups. Being in a party where you can communicate (in party chat or voice chat) will expedite learning. People often post strats in PF descriptions too.
Enjoy the Story and Atmosphere: Dawntrail’s Arcadion raid has a fun story tying it together (no spoilers here, but the premise of a grand arena and the characters involved are quite entertaining). Don’t rush so much that you skip the cutscenes – take a moment to soak in the lore after each clear! Also, the music is top-notch (shoutout again to “Give It All”, the final boss theme, which had players raving).
Plan Your Loot: Since you can only get one item per boss per week, decide what your priorities are. For many players in week 1, getting an accessory from each boss (since they cost 1 token each) is an easy way to raise item level fast. In week 2+, focus on bigger pieces like chest and legs (which need 4 tokens total, so you collect 2 tokens per week from later bosses). If you’re also capping tomes, you might fill other slots with tome gear and use raid tokens for the slots tomes can’t cover or to avoid overlap. By planning, you won’t waste any drops.
Compare with Friends: If you have friends clearing the raid too, coordinate your token trades – e.g., one person grabs body first, another grabs legs, then swap next week so you can loan each other gear for glamour or just ensure your static has well-geared roles. (In static groups, often they assign loot so that, say, tanks get geared first for survivability, etc. In casual groups just roll need on what you actually plan to buy.)
With all that said, you should be fully prepared to tackle The Arcadion: AAC Light-heavyweight. Good luck, have fun, and may your rolls be ever in your favor! Go forth and become the Light-heavyweight champion of Eorzea! 🏆