The Omega Protocol (Ultimate), often abbreviated as TOP, is one of Final Fantasy XIV’s ultimate-difficulty raids – a brutal battle that tests even the most skilled players. Introduced in patch 6.31 during the Endwalker expansion, TOP is inspired by the Omega raid series and imagines a “what-if” scenario where Omega’s experiments continued to their ultimate conclusion. This guide will walk you through step-by-step how to unlock The Omega Protocol (Ultimate) in 2025 and prepare your team for victory. We’ll cover the prerequisites you must complete, the unlocking process, and essential preparation tips – including job composition, strategy resources, and community insights from veteran raiders. By the end, you’ll know exactly how to access this encounter and how to set yourself up for success in one of FFXIV’s most challenging battles (which many players note is among the hardest content in the game). Let’s dive in!

Step 1: Complete the Abyssos Savage Prerequisite (P8S)
Before you can unlock TOP, you must clear the raid “Abyssos: The Eighth Circle (Savage)”, commonly called P8S. This is the final fight of the Pandaemonium Abyssos Savage tier (level 90 raid series). Clearing P8S is mandatory – not just for you, but for everyone in your party who wants to enter The Omega Protocol. In other words, all eight players must have the P8S completion on their record to access the Ultimate fight.
- Make sure you’ve finished the Abyssos storyline (the normal mode of the eighth circle) and then progressed through Savage up to P8S. If you haven’t, you’ll need to form or join a group to clear it.
- Unsynced or high-level help: By 2025, many players outgear P8S, making it easier to beat. You can attempt P8S with a level 90 synced party using current gear (echo will apply and gear sync is higher now) or wait until you’re higher level (if a new expansion raised the cap) to do it unsynced. For example, one player noted that Asphodelos: The Fourth Circle Savage (P4S) became “pretty easy unsynced,” whereas P8S still requires some knowledge of mechanics (looking at you, Natural Alignment) even with higher gear. So don’t underestimate P8S; familiarize yourself with its major mechanics to get that clear.
- Get help if needed: If you’re returning to the game or never raided Savage, consider asking friends, Free Company mates, or use the Party Finder to find a group for P8S. Many veteran players or statics offer clears for older Savage fights. Just ensure everyone knows the mechanics or has a guide – P8S’s “Natural Alignment” mechanic can be a showstopper if ignored. Practice, watch a guide, and clear this prerequisite at your own pace.
Clearing P8S rewards you with an achievement and unlocks the Ultimate raid’s availability. Once you see the completion screen for Abyssos: The Eighth Circle (Savage), you’re ready to move on to the unlocking quest!
Clearing Pandaemonium: Abyssos (Savage) – P8S in Final Fantasy XIV is one of the toughest PvE challenges, requiring perfect execution and a well-coordinated team. With our P8S Boost service, you can skip the frustration, secure your clear, and claim powerful Abyssos gear and exclusive achievements hassle-free!
Step 2: Unlock The Omega Protocol (Ultimate) via the Wandering Minstrel
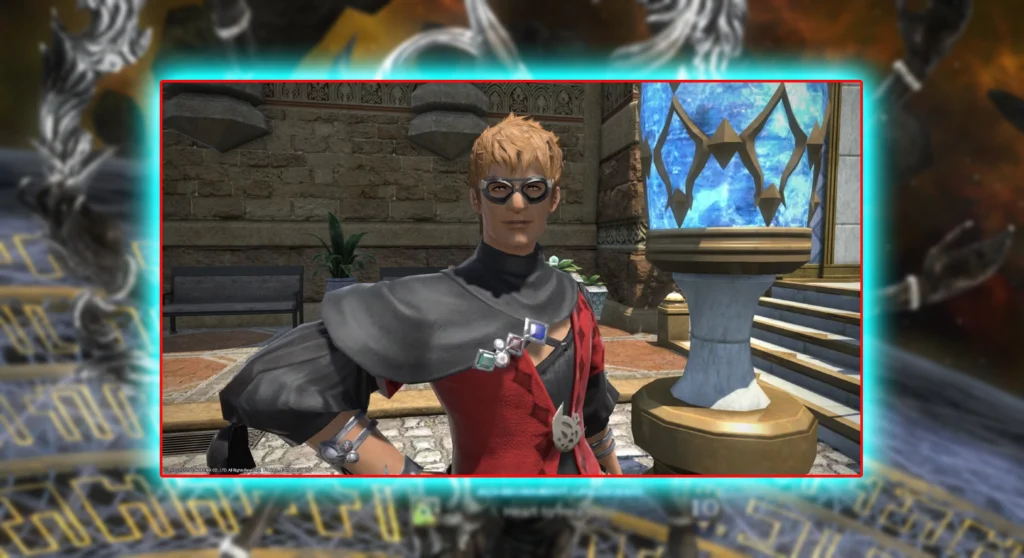
With P8S cleared, the door to The Omega Protocol (Ultimate) opens. The next step is to speak with the Wandering Minstrel NPC in Old Sharlayan. This storytelling bard is the key to unlocking Ultimate encounters in Endwalker.
- Find the Wandering Minstrel in Old Sharlayan – he’s located at X:12.7, Y:14.2 in Old Sharlayan. Make sure you are on a level 90 combat job (Disciple of War or Magic) when you talk to him. He will recognize your triumph over Abyssos (P8S) and regale you with a tale that unlocks the new challenge. (The quest is often titled something like “I Wandered Sharlayan as a Minstrel”, indicating the minstrel’s song about Omega.)
- Unlock quest and duty: After the dialog, you’ll receive a prompt that The Omega Protocol (Ultimate) is now accessible. No lengthy quest chain is needed – just this brief interaction. Once unlocked, TOP will appear in your Duty Finder under “Raid Finder – Ultimate Raids.” You cannot enter it through the normal duty matching; Ultimate raids require pre-made parties.
- Raid Finder settings: To enter TOP, form a full party of 8 players (all of whom have P8S cleared) and register via the Raid Finder. The encounter is listed as level 90 Ultimate, “The Omega Protocol (Ultimate).” Keep in mind that you cannot use Duty Finder matchmaking for Ultimates – you must manually assemble the group. The Raid Finder will let you in once all party members meet the entry requirements. If anyone in the group lacks the P8S clearance or quest unlock, the game won’t allow entry, so double-check everyone beforehand.
- Instance details: The Omega Protocol (Ultimate) has a 120-minute time limit and allows no unsync (you will be level-synced to 90). The minimum item level to queue is ilvl 630, but this requirement can be bypassed since you’ll be entering with a full party anyway. Note that the fight will sync your gear to ilvl 635, meaning any gear above i635 gets scaled down to keep the challenge consistent. (As of its release, i635 was the max gear from Abyssos Savage, and even in 2025 the sync remains, so new higher gear won’t give an unfair advantage in this Ultimate.)
After talking to the Wandering Minstrel and fulfilling the conditions, you have officially unlocked The Omega Protocol (Ultimate)! Now it’s visible in your duty list – but unlocking is just the beginning. The real work is preparing to conquer this Ultimate fight.
Step 3: Assemble Your Ultimate Raid Team (Jobs and Composition)
Ultimate raids in FFXIV are not solo content – you’ll need a well-coordinated team of 8 players. How you assemble your party and what jobs you bring can influence your progression experience. Here’s how to set up a team for TOP:
Static group vs. Party Finder: Ideally, tackle TOP with a static group (a dedicated team) or a committed set of friends. Consistency is key; you’ll be practicing together for many hours. While it’s possible to use Party Finder to prog Ultimate, it’s considerably harder to make steady progress with random players and variable groups. If you don’t have a static, consider reaching out on Discord communities (like Ultimate Uncoiled or data center Ultimate raiding discords) to find likeminded players. Many raiders in 2025 are still running TOP, so you might find groups recruiting. Just ensure everyone agrees on schedule and goals.
Recommended party composition: An optimal party follows the standard 2 tank, 2 healer, 4 DPS setup. Specifically: 2 Tanks, 2 Healers, 2 Melee DPS, 1 Ranged Physical DPS, 1 Ranged Magical DPS. This covers all roles and maximizes Limit Break options. One community expert summarized it well: “The best comp is a comp where you have 2 healers, 2 tanks, 2 melee, 1 caster, and 1 physical ranged, and everyone is playing the job they are best at. Skill outweighs the 1–3% differences between jobs any day.” In short, bring a balanced team and have each player on the job they perform best. Player proficiency matters far more than class meta in Ultimates.
Example team setup: You might run, for example, Dark Knight + Warrior (tanks), White Mage + Scholar (healers), Dragoon + Samurai (melee), Bard (physical ranged), and Summoner (caster). Any job can work, so long as role distribution is met. Use a composition that fits your group’s strengths. We’ve tabulated the typical roles below:
| Role | Examples (Not exhaustive) | Role Notes |
|---|---|---|
| Tank (2) | Paladin, Warrior, Dark Knight, Gunbreaker | One main-tanks the boss, the other off-tanks. Both tanks must coordinate tank swaps, cooldown usage, and handle boss mechanics targeting tanks. Any tank combo works – play what you’re comfortable with. |
| Healer (2) | White Mage, Scholar, Astrologian, Sage | Often one pure healer (WHM/AST) and one shield healer (SCH/SGE) for balance. Healers keep the team alive through massive raid damage, coordinate mitigation, and often handle specific healing-intensive mechanics. |
| Melee DPS (2) | Dragoon, Monk, Samurai, Reaper, Ninja | Melee have high personal DPS and contribute Melee Limit Break. Having two melee DPS is common for TOP – players note it helps generate an extra melee LB3 in the final phase for maximum damage. Melees will stick to the boss and handle melee-specific mechanics (like baiting certain AoEs). |
| Ranged Physical DPS (1) | Bard, Dancer, Machinist | Ranged DPS attack from distance and often provide team buffs (BRD/DNC) or extra mitigation tools (e.g. Troubadour, Shield Samba/Tactician). They have the flexibility to handle mechanics at range. Any physical ranged works; Bard/Dancer give raid DPS buffs, while Machinist offers high personal DPS and a bit of shielding utility. |
| Ranged Magical DPS (1) | Summoner, Red Mage, Black Mage | Caster brings powerful magic DPS. Summoner (SMN) or Red Mage (RDM) are popular because they can combat rez allies. However, a skilled Black Mage (BLM) brings top damage. Note that in TOP, if someone dies it often causes a wipe anyway, so some groups forego rez utility for more DPS. In fact, many players argue a great BLM is optimal, as “you will literally save more pulls with extra damage letting you meet the enrage check after a death or two than SMN/RDM will with raise”. For most groups, though, having a SMN or RDM as insurance is comforting. Choose your caster based on your team’s confidence and the caster player’s skill on BLM versus other jobs. |
- Job comfort over meta: The table above gives examples, but remember – play what you’re best at. If your group’s Dragoon keeps dying but they excel as a Reaper, let them swap. The margin differences in DPS between jobs are tiny compared to the cost of mistakes. It’s far better to have a reliable clear with non-meta jobs than to struggle because someone is playing an unfamiliar “meta” job. Every job has cleared TOP at this point, so maximize your players’ comfort.
- Communication is key: Ensure your team has a voice communication channel (Discord, etc.). While not strictly required by the game, Ultimate-level coordination essentially demands voice callouts and quick discussions. Calling out mechanics (“Delta attack coming in 5 seconds!”, “Stack on A now!”) will greatly improve your success. It also helps keep morale up during long progression hours. Make sure everyone’s on board with communication norms.
- Plan roles for mechanics: Once your jobs are set, assign each player specific responsibilities for mechanics. Ultimates often have mechanics where each role has a job (e.g. soaking towers, handling tethers, using Limit Breaks at certain points). Early on, decide things like who will handle limit breaks, tank swap timing, immunity usage, etc. For example, plan which tank uses Tank LB3 if needed for heavy hits, or which healer will heal vs mitigate during big raidwide damage. Clear assignments prevent confusion mid-fight.
Community Insight: Don’t stress too much about having the “perfect” comp. Many unorthodox setups have also cleared TOP (there’s even a report of a group clearing with no traditional healers using Blue Mage-like strategies, though that’s an extreme challenge!) The most important factors are team synergy and understanding mechanics. As one Reddit user put it plainly: “The jobs you’re good at [are the best jobs to bring].” Step 4: Gear Up – Item Level, Materia and Consumables
Even though gear is synced in TOP, you’ll want to enter with the best possible setup to maximize your damage and survivability within those sync restrictions. In 2025, gearing your level 90 job should be straightforward, but here’s a checklist:
- Item Level requirements: The minimum item level to enter TOP is iLvL 630 (the level of gear from normal Abyssos raids or early Endwalker tomestones). However, when you fight, the instance will sync all gear to iLvL 635. This means that any item level above 635 will be scaled down. By now, Endwalker’s final tier gear (from Pandaemonium Anabaseios Savage or tomestones) is i660+, which is above sync. Essentially, as long as you have at least ilvl 635 on all slots, you’re effectively at the cap for this fight’s stats. Aim to gear up to ilvl 635 or higher on your character. If you have only newer gear (which is higher), that’s fine – the sync will handle it. If you’re exactly around 630, consider getting some upgraded pieces to reach 635 for a slight edge before sync kicks in.
- Best-in-slot (BiS) for sync: Dedicated raiders often pursue a “synced BiS” – essentially the optimal stat gearset at i635. This usually means full Abyssos (Savage) gear or Augmented Lunar Envoy gear (tomestone gear upgraded) from patch 6.3 era. If you have those pieces, great. If not, any high-grade gear will do. Meld your gear with materia for further stat boosts – even though materia stats get synced too, they still count up to the cap. Putting in melds (Critical Hit, Direct Hit, Determination, etc. as appropriate for DPS, or Tenacity/Piety as needed for tanks/healers) ensures you’re hitting the stat ceilings. Don’t forget pentamelding crafted accessories if you’re using any high-quality crafted gear, though with the availability of Savage gear by 2025, most players will just meld the available slots on raid gear.
- Consumables: Food and tinctures are essential for Ultimate raiding. Always have your food buff active in TOP – it provides a significant boost to your main stat and vitality (HP), which can be the difference between life and death in tight damage phases. Use the best food available for your job. For example, a Dragoon might use Carrot Pudding HQ (which gives crit and det), a tank might use Baked Eggplant HQ (for Tenacity and Vit), etc., depending on current food options. Pick a food that complements your job’s stat priorities and make sure it’s High Quality for maximum stats. Food buffs last 30 minutes (HQ gives an extra 5 minutes), so bring stacks to every raid night.
- Tinctures (Potions): High-end stat tinctures (often called pots) provide a 30-second burst of increased damage/healing. For level 90 content, you’ll be using Grade 6 Tinctures (e.g., Grade 6 Tincture of Strength for physical melee/tanks, Grade 6 Tincture of Intelligence for casters, Grade 6 Tincture of Mind for healers, etc.). These increase your main stat by 8% (up to a cap), enabling you to hit harder during burst windows. In TOP, you’ll typically use a tincture at the pull (countdown 0) to buff your opener, and then again when it comes off cooldown (they have a 4m30s cooldown). Coordinate potion usage with your raid buffs timing for optimal effect. Make sure every DPS and tank has a full supply of their relevant tinctures – those extra percentages of damage are required to meet the strict damage checks in an Ultimate.
- Repair and Durability: Ultimate attempts involve hundreds of pulls. Your gear will take a beating from wipes. Repair your gear to 100% before starting a raid session. Consider carrying some Dark Matter and using a Repair NPC or the one in the raid entrance area between pulls if needed. Alternatively, having a crafter in the group who can repair gear on the fly is helpful. Nothing’s worse than having to halt progression because someone’s weapon broke mid-fight!
- Echo buff (if applicable): Down the line (usually in later patches), SE sometimes adds an Echo to older Ultimate raids, giving players a passive buff after many wipes. As of patch 6.55, TOP does not have an Echo (and likely won’t until much later if at all). Don’t expect any in-game buff to help you – you must conquer this with pure player strength and coordination.
- Macros and addons: While third-party tools are against the TOS, many players legally use in-game macros to mark waypoints or to announce mechanics. For example, you might make a macro to place waymarks at specific positions (there are community waymark presets for TOP). Additionally, you can prepare notebooks or diagrams of the arena with positions numbered or labeled for assignments. External tools that automate callouts are not allowed and were a point of controversy during TOP’s world race – but you won’t need those if you and your team prepare properly.
In summary, enter TOP fully melded, fed, and potted. The fight is scaled to a fixed item level, so victory comes down to execution – but being optimally geared gives you the full advantage of that item level cap. Every bit of DPS and HP can matter. It’s wise to also bring some extra potions and food to each session, since progression can eat up many consumables over time.
Looking for a fast, hassle-free way to level multiple jobs in Final Fantasy XIV? Our specialized FFXIV Job Leveling service removes the grind, helping you overcome complex role challenges, free up precious gaming time, and unlock advanced content sooner—so you can fully enjoy the epic story, powerful raids, and vibrant community Eorzea has to offer.
Step 5: Learn the Fight – Phase-by-Phase Strategy and Resources
Unlocking TOP is a proud moment, but the real challenge lies in learning and conquering the encounter’s mechanics. The Omega Protocol (Ultimate) is an extensive multi-phase fight (roughly ~15 minutes long) with complex mechanics that require precision, timing, and teamwork. A step-by-step approach to progression is crucial: you’ll want to master one phase at a time. Here’s an overview of the fight’s structure and some tips on learning it:
Fight Phases Overview: TOP has several distinct phases, each escalating in difficulty. In order, you’ll face:
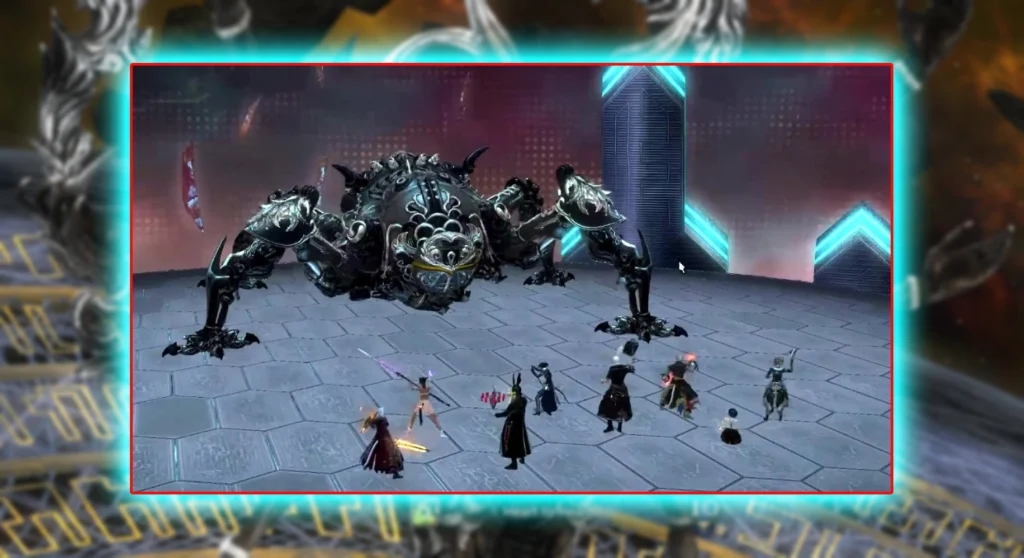
- Phase 1: Omega – You battle Omega in its base form (sometimes nicknamed “Beetle Omega” by players due to its appearance). Expect mechanics inspired by the Alphascape raid (O12 normal/Savage). This phase introduces fundamental patterns like alternating tankbuster/sides, raidwide damage, and the first complex mechanic sequence.
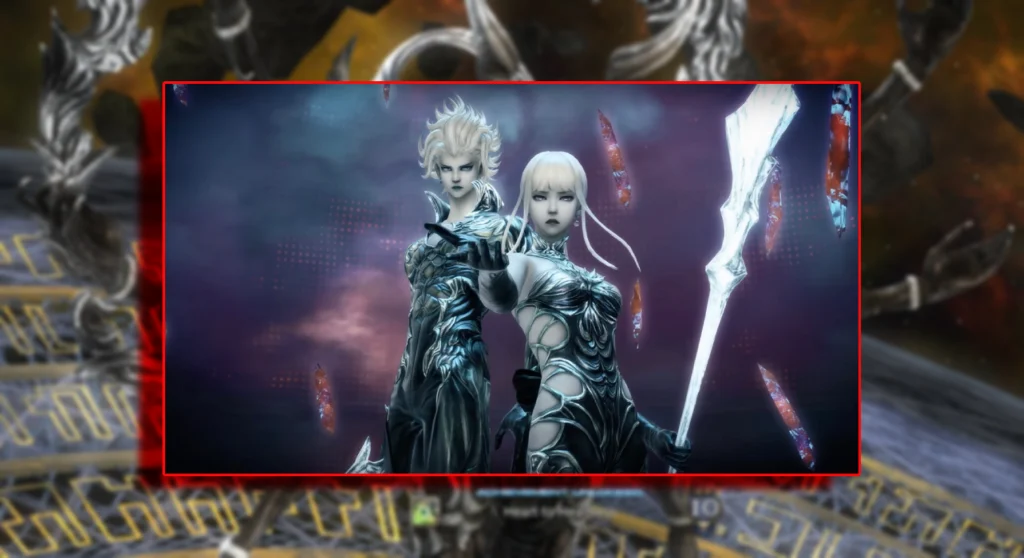
- Phase 2: Omega-M & Omega-F – Omega splits into two entities (the male and female Omega forms from the Sigmascape series). Your team will fight both bosses simultaneously, dealing with mechanics that involve coordination between the two (tethers, shared HP or synchronized attacks). You’ll likely need to split your group or quickly swap targets. This phase can be hectic, and typically one boss buffs or debuffs players while the other does something complementary – requiring multi-tasking.
- Intermission: Reconfiguration – After Omega-M/F are defeated, there’s a brief downtime where Omega “reconfigures” itself. Think of this as a transition phase with some incidental mechanics but mostly a moment to catch your breath (if only slightly). The arena or boss might change form.
- Phase 3: Reconfigured Omega (Omega Prime) – Omega returns in a new form often referred to as Omega Prime, combining aspects of its previous forms. This phase ramps up complexity with new combinations of mechanics. You’ll see some familiar attacks from the original Omega raids (like “Hello World”) coming back with Ultimate-level twists. Expect heavy raid damage and strict positioning requirements.
- Phase 4: Damaged Omega – As you push Omega Prime to low health, it becomes unstable/damaged. Phase 4 continues the Omega Prime fight with additional dangerous mechanics (possibly an “enrage soft-check” where you must push enough damage while handling tricky dodges). The boss might start using ability combos that force near-perfect execution from all players. Any mistake here is likely fatal.
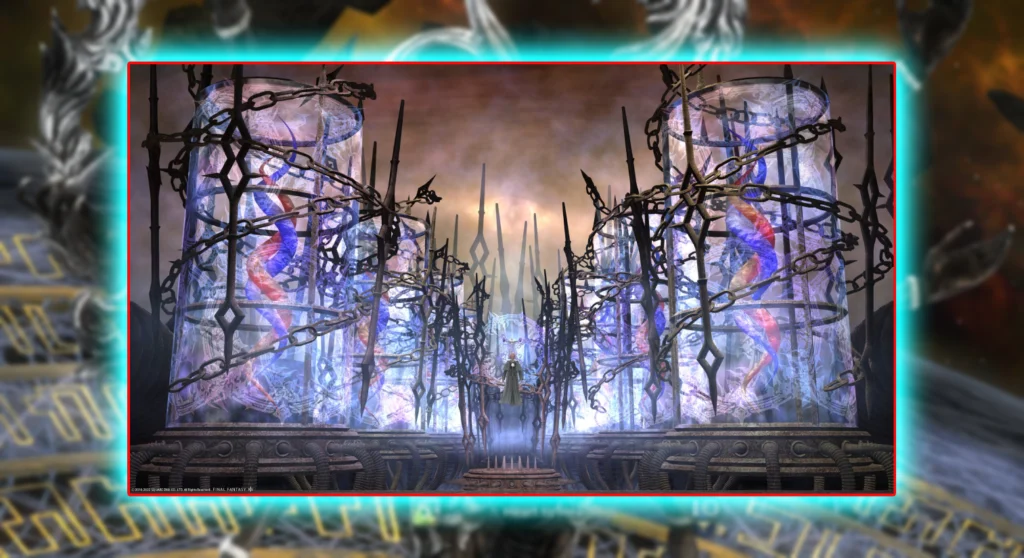
- Phase 5: Dynamis Omega-M & F (Trio Mechanics) – Omega brings back the Omega-M and Omega-F constructs powered up by Dynamis (an energy from the story). This phase is structured as a series of “trios” – sequences where the boss is untargetable and the party must survive a gauntlet of mechanics involving multiple simultaneous threats. Team coordination is paramount; you’ll handle things like towers, stack/spread combos, and possibly revisiting mechanics from earlier phases but combined in new ways. Many groups consider Phase 5 one of the hardest parts of TOP due to its complexity. Successful completion will empower your party with Dynamis (in the lore sense). In gameplay, players who survive Phase 5 might gain a special buff allowing unique actions – for instance, free Limit Break usage at the start of the next phase.
- Phase 6: Alpha Omega (Final Phase) – The final phase of TOP, often dubbed Alpha Omega, is the culmination of the fight. Omega taps into the concept of “Alpha” (perhaps even summoning the cute Alpha companion in some form) to create one last, extremely intense encounter. This phase is a true final DPS check and will throw everything at you: overlapping mechanics, high damage, and an Enrage timer that looms. Notably, because of the Dynamis buff from Phase 5, your party can unleash multiple Limit Breaks here (often a predetermined sequence of LB usage is employed to maximize damage and survival). Many strategies involve using tank LB, healer LB, and multiple DPS LB3s in a row at specific timestamps to mitigate and push damage during the final moments. Expect an adrenaline-pumping finale where one mistake means starting over!
As you can see, there’s a lot to learn. Each phase could be a chapter of its own in a guide. Your team should focus on progressing through phases one by one:
- First, reach the end of Phase 1 consistently. Learn how to handle Omega’s initial combos until you can do it cleanly every pull. Then push into Phase 2.
- Work on Phase 2 until you can beat Omega-M & F reliably. This might take dozens of pulls. Once cleared, use the downtime to recuperate, then Phase 3 begins.
- Repeat this progression structure: treat each phase as a checkpoint (mentally; the game doesn’t save progress, you start at Phase 1 every time, but reaching a new phase is a big milestone for the group).
Study resources: To conquer TOP, knowledge is power. Virtually all groups rely on community-created guides, diagrams, and videos to learn the mechanics (especially since Ultimate mechanics can be extremely obscure to solve on your own). Here are some ways to learn efficiently:
- Watch guide videos: There are excellent phase-by-phase video guides created by the FFXIV community. For example, content creators Ilya Dalamiq and Azurite each have comprehensive videos for every phase of TOP. These guides show the mechanics and often provide recommended strategies (positions, assignments, etc.). Watching these as a team, or individually, before you progress into a new phase will save you a lot of trial and error. MrHappy has a full fight breakdown/discussion video and others like Hector Hectorson (Mystic Raven) have “visual guides” for Ultimates. Find a style that works for you – some players watch POV videos from jobs similar to theirs to see how to move and react. Tip: Don’t just watch passively – discuss with your team after: “Okay, when we reach Phase 3, we’ll try the positions from this guide for Hello World,” etc.
- Use written guides and timelines: In addition to videos, refer to written strategy guides. Websites like Icy Veins and community wikis break down mechanics in text form (sometimes easier to reference quickly). There are also user-made timelines and spreadsheets for TOP that detail the timing of every mechanic, which can be extremely helpful for planning cooldown usage. For instance, the NA Ultimate Raiding discord shared a mitigation timeline sheet for TOP – this kind of document tells you exactly when big hits occur so your tanks/healers can plan shields and cooldowns in advance. Print it out or keep it on a second monitor.
- Community discussion and questions: Don’t hesitate to ask questions in raiding communities (The Balance discord, Reddit’s r/ffxiv or r/ffxivdiscussion threads, etc.). Often, other players can share tricks or easier strats for particularly nasty mechanics. The FFXIV Reddit community shared, for example, that in TOP’s later phases, relying on healer/caster raise is less useful because usually a death means a wipe anyway. Insights like these (e.g., preferring a Black Mage for more damage rather than a Red Mage for raises) can influence your strategy. Engaging with others who have cleared can give you ideas to adjust your approach.
- Practice tool – Stone, Sky, Sea: One practical prep tip is to have your DPS players use the Stone, Sky, Sea training dummy for TOP. This is a solo instance that provides a dummy with the same HP as the boss’s enrage requirement (adjusted for one DPS). It lets each DPS test if their output is roughly sufficient within the time limit. It’s a good way to ensure your rotation and potion usage are on point. If you can consistently beat the TOP dummy for your job, you’re likely contributing enough damage. If not, you may need to improve your rotation or gear/melds.
- Phase-specific assignments and macros: As you study each phase, create a cheat sheet for your group’s specific strategy. For example, make a diagram showing where each player will stand during Hello World or label towers A/B/C and assign pairs to them. Many groups use in-game waymark presets (placeable markers like A, B, C, 1, 2, etc.) to designate positions for stacking or baiting mechanics. You can save these waymarks and paste them each time you enter the instance. Having clear, agreed-upon markers (e.g., “Melee stack on A, Ranged on B during X mechanic”) prevents chaos when you reach that point in battle.
Community Insight: Preparation outside of raid time is huge. A veteran player remarked that “most players who took 1k+ pulls [to clear] studied the phase they’re progging 100% before entering the instance”. In other words, teams that succeed tend to do a lot of homework: watching POVs, reviewing logs, and mentally simulating mechanics between raid sessions. The more each member internalizes the fight, the smoother your progression nights will be.
- Expect a challenge: TOP was designed to be one of the toughest fights in the game. Many who cleared both Dragonsong’s Reprise (the previous Ultimate) and TOP have noted that while TOP’s mechanics might be slightly less puzzle-like than DSR, it is far more punishing – any mistake can wipe the group, and later phases leave almost no room for recovery. It’s normal to wipe hundreds of times learning an Ultimate. Don’t be disheartened by slow progress. Celebrate small victories, like “we consistently reach phase 5 now!” That means you’re improving. Ultimate raids are as much about endurance and group cohesion as they are about individual skill.
By thoroughly learning each phase, using community guides, and maintaining strong communication, you’ll gradually turn those impossible-feeling mechanics into second nature. Many groups have cleared TOP since its release, and with all the resources now available, you have a much clearer road than the world-first racers did. Use that to your advantage!
Step 6: Progression Tips and Final Preparations for Victory
Now that you understand what you’re up against and have done your homework, it’s time to actually step into The Omega Protocol (Ultimate) and start prog (progression). Here are some final tips to keep in mind as you and your team work toward the clear:
- Set realistic goals and schedule: Ultimate prog can take weeks or even months of regular raiding sessions, depending on group experience. At minimum, even a very skilled group might spend 40-50 hours to clear TOP; more average groups might spend 100+ hours over several weeks. Set a raid schedule that fits everyone (e.g. 2-3 nights a week, 3-4 hours per night). At the end of each session, discuss how far you got and set a goal for the next one (e.g. “Tomorrow, let’s aim to reach Phase 3 reliably”). Manage expectations: one Redditor noted that many people breezed through early phases only to “spend weeks or even months on P5-6”. It’s all part of the journey. Patience is key.
- Communicate and adapt: During prog, encourage an environment where team members can call out if they need help or want to adjust strategy. If a particular mechanic isn’t clicking, pause and discuss a different approach. Maybe swap assignments (e.g., have the other healer handle a certain debuff if the current setup isn’t working). Adaptation can save you dozens of pulls. Just be sure to give a strategy a fair number of attempts before changing too much; sometimes practice is all that’s needed.
- Keep morale high: Wiping in the same phase for hours can be demoralizing. Try to keep the mood positive or at least focused. Celebrate each little improvement (“we shaved 5 seconds off that DPS check” or “no one died to that mechanic this time!”). If frustration is building, propose a short break. It’s amazing what a 5-minute breather or a quick stretch can do to refocus everyone. Remind each other that eventually, persistence pays off. Every Ultimate has a learning curve that feels steep – until suddenly everything clicks.
- Use downtime effectively: The 2-hour instance timer resets every time you re-enter, and you’ll often reset early when learning first phases. Use the downtime between pulls wisely: while someone is resetting the instance, others can quickly discuss what went wrong (“I got clipped by that AoE – I’ll move faster next time” or “we need to pre-position for the tower mechanic”). These mini post-mortems, kept brief, can help everyone adjust on the fly. Just avoid long strategy debates mid-instance; save detailed theorycrafting for outside of raid hours or between sessions so you don’t lose too much on-floor practice time.
- Leverage the Dynamis LB buff in final phase: Once you consistently reach Phase 6, coordinate your Limit Break usage plan. As mentioned, thanks to Dynamis, players with 3 stacks get a refill of the LB gauge after using a Level 3 LB. This typically leads to a sequence of multiple LB3s in the final phase. For example, a common approach: Tank LB3 to survive a massive hit, then immediately a Melee DPS LB3 for damage, then another Melee or Caster LB3 after the gauge refills, etc. Knowing who will LB and when is crucial (nothing’s worse than two DPS accidentally pressing LB at the same time and wasting one!). Map it out: e.g., “Paladin uses Tank LB3 at X%, then Dragoon uses LB3 at 5% enrage, then if boss still alive Black Mage uses LB3.” Practice this in the final phase once you get there, so your execution is clean when it counts.
- Stay focused during the clear pull: Eventually, you’ll have that “pull of destiny” – everything is going right, everyone is alive in final phase, boss at 1%… This is where nerves can cause silly mistakes. Train yourselves to treat that pull like any other – stick to your plan, callouts, and rotations. Don’t let the “almost there!” excitement break your concentration. The boss isn’t dead until the duty complete text appears! Conversely, even if something goes awry early in a pull, if it’s salvageable, keep going – you might still get valuable practice on later mechanics.
- Enjoy the moment: When you finally land that last hit on Omega and the “Duty Complete” flashes, relish it! Clearing an Ultimate is a huge accomplishment. You and your team will have earned not just loot, but bragging rights and a lifelong memory of triumph. Make sure to take screenshots of the win and congratulate each other heartily. Many groups take a group photo with the boss arena in the background as a trophy.
Rewards for clearing TOP: On clearing The Omega Protocol (Ultimate), each player receives some exclusive rewards:
- Omega Totem: This is a unique token item. You can exchange this Omega Totem with the NPC Nesvaaz in Radz-at-Han (X:10.6, Y:10.0) for one of the Ultimate Omega weapons of your choice. Each job has a shiny weapon with an Omega-inspired design. Choose whichever you like (you get only one totem per clear, and it’s consumed on trading for a weapon). The weapons have the same item level as other Ultimate rewards – currently i635 – and are mostly for prestige/glamour (they won’t be BIS in 2025 due to higher item level gear, but they look amazing!). Originally you could only get one totem per week, but as of patch 6.4 this restriction was removed, so you can earn and trade multiple totems by clearing multiple times. In other words, if you want more than one weapon, you can farm additional clears with your group without waiting weekly.
- Title “The Alpha Legend”: An exclusive title is unlocked via an achievement for clearing TOP. The achievement “Heart to Heartless” grants the title “The Alpha Legend”, which you can wear proudly to show you conquered Omega’s ultimate challenge. (Fun fact: Each Ultimate raid in FFXIV gives a special title; for Omega, the reference to “Alpha” is a nod to the lovable companion character and the concept of being the first or alpha legend.)
- Adventure Plate design: TOP also unlocks a new Omega-themed design for your Adventurer Plate (the profile placard), letting you customize it with an Omega motif. It’s a nice cosmetic touch to commemorate your victory.
- Bonus loot: The first time you clear in a week, you might get 100 Poetics tomestones (minor reward). More importantly, you’ll have the satisfaction of seeing Omega’s story to its end – and perhaps a small cutscene or dialog snippet wrapping up the Minstrel’s tale.
With loot in hand and the title by your name, you’ll have unlocked and conquered The Omega Protocol (Ultimate). Take pride in this achievement – by 2025, only a fraction of the playerbase has these Ultimate titles. You’ve joined the ranks of the elite raiders who pushed themselves to the limit.
Conclusion:
Unlocking TOP and defeating it is a journey that requires dedication, skill, and teamwork. From clearing P8S, to organizing your static, gearing up, and spending nights learning complex mechanics, every step is a test of your resolve. Remember that Ultimate raids are designed to be incredibly difficult – as some have said, “the singular hardest content in the game, so be prepared to grind at it for a while”. But they’re also incredibly rewarding. Not just for the weapons and title, but for the sense of accomplishment and camaraderie built with your team.
By following this guide, you’ve set yourself on the right path. You know how to unlock the fight, what preparation is needed, and how to leverage community resources to overcome the challenge. All that’s left is to execute, persevere, and enjoy the learning process. Good luck challengers, and may you soon proudly call yourselves “The Alpha Legend” after unlocking the ultimate victory in The Omega Protocol!
\Blueprint for success: Complete P8S, talk to the Minstrel, gather your allies, study hard, and never give up. Omega’s final protocol will test you – but with determination, you’ll break the limits (and maybe even break Omega itself). Happy raiding!