

Occult Crescent is the newest large-scale exploration zone introduced in Patch 7.25 of Final Fantasy XIV. This place brims with powerful monsters, treacherous landscapes, and hidden rewards. Venturing into Occult Crescent (specifically the South Horn region) can feel intimidating, but you’ll soon master its unique systems and thrive. This guide covers every vital aspect, from unlocking the zone to surviving brutal one-shot attacks. Keep reading to learn about Knowledge Rank progression, Phantom Jobs, group strategies, and more.

Unlocking the Occult Crescent
You must meet specific requirements to enter the Occult Crescent. One combat job must be at level 100 or higher, and you must complete the Dawntrail main scenario. Speak with an Expedition Messenger in Tuliyollal, who gives the quest “One Last Hurrah.” That task sends you on a journey to the mysterious South Horn via an airship. Equip gear with at least item level 690 or higher. Anything above item level 700 gets synced to 700 within the zone, so focus on strong gear that doesn’t exceed that threshold by too much.
Following a brief sequence of cutscenes, you’ll arrive at the South Horn. Complete several introductory quests at the local Base Camp to unlock the Occult Record log in your Collection menu. These quests also teach you to use the anchored airship to return to Tuliyollal. You’ll talk to an NPC named Archive, and you’ll learn about the special survey items scattered around the region. Once you finish “New Job, Old Tricks,” you’ll unlock Phantom Jobs—an essential system for survival in Occult Crescent. When you complete “Creatures of the Crescent,” the training wheels come off, and you’re free to explore this wild new territory.
Zone Layout and Locations

The South Horn region of the Occult Crescent is an enormous open zone filled with jungle thickets, spooky ruins, and hordes of dangerous foes. Base Camp, also known as the Phantom Village, sits in the northeast. You’ll find essential NPCs here, including Archive, a gear repair vendor, a weather skywatcher, and a moored ship that ferries you back to the main city. Consider Base Camp your safe haven. Monsters do not enter, and your character respawns there if you happen to fall in combat.
Unlock Teleports Early
The island features several aetheryte-like teleport shards that let you warp around. You can attune to them at any Knowledge Rank, so it’s best to run around and grab them early. Doing this reduces your travel time and, in many cases, saves your life. Mobs won’t hold back, so be prepared for a few “suicide runs” if you try to sprint through high-level zones before you’re ready. At Knowledge Rank 1–4, death doesn’t penalize your experience, so those early levels are perfect for exploring.
Differing Enemy Levels
Enemy difficulty ramps up the farther you move from Base Camp. Low-level creatures near camp suit players at Knowledge Rank 1–5. Stronger monsters occupy the central and southern areas, often in the level 20–28 range. Approach them with caution. If an enemy displays a skull icon or double-crescent symbol, expect it to hit extremely hard. Mark those areas “danger zones,” and wait until you’ve advanced in Knowledge Rank or grouped up with friends before you explore them deeply.
No Flying in the Crescent
You cannot fly in this zone, so prepare to travel on foot or by ground mount. Clever jumps and strategic line-of-sight tactics can help you escape overwhelming foes. Some ruins hide powerful rewards or special FATE-like events that grant unique loot. Magic Pots occasionally appear during those events, and feeding them an Elixir might reveal hidden treasure chests. Keep an eye on your surroundings for such encounters, especially if you’re a collector who likes to gather rare items.
Knowledge Rank: Leveling Up in the Crescent
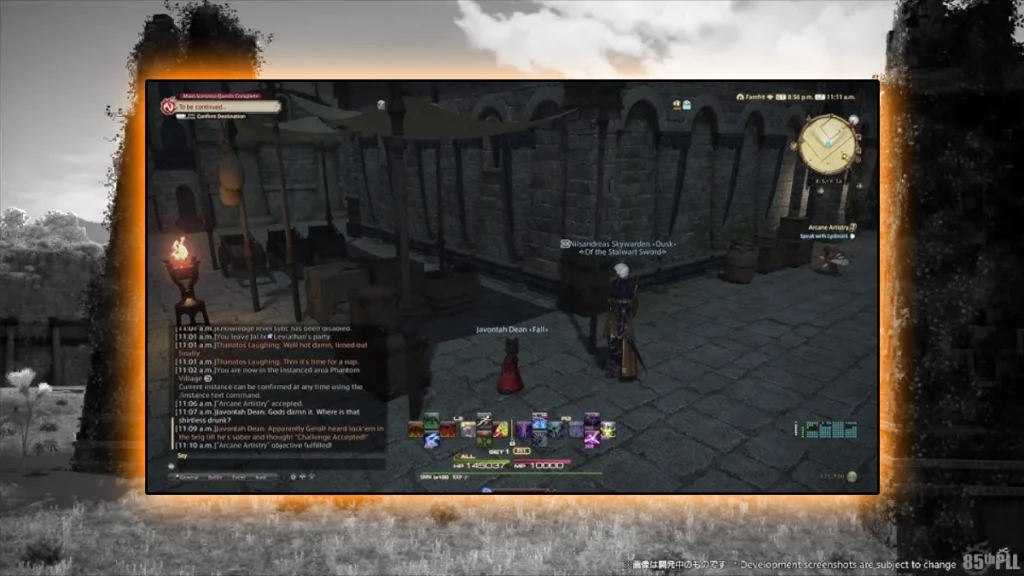
Combat level alone won’t determine your power in Occult Crescent. This zone relies on a separate leveling track called Knowledge Rank. Everyone starts at Knowledge Rank 1. By defeating monsters, completing FATEs, and finishing certain quests, you’ll earn “knowledge EXP.” Each rank increase greatly boosts your damage and defense inside this zone, making it critical for survival.
Gaining Experience Efficiently
Grouping up to chain-kill mobs offers a popular method for fast knowledge EXP. Enemy chains provide bonus experience if you defeat them in quick succession, especially when they’re close to your own Knowledge Rank. Weekly challenges also deliver large exp chunks if you clear enough mobs or FATEs in Occult Crescent. Remember to do any side quests that appear, since many yield extra knowledge EXP or special currency.
Knowledge Rank XP Table
Here’s a helpful reference for how much EXP you need between each Knowledge Rank. Keep in mind actual requirements may vary slightly based on patch adjustments:
| Knowledge Level | EXP to Next Level |
|---|---|
| 1 → 2 | 100 |
| 2 → 3 | 600 |
| 3 → 4 | 2,800 |
| 4 → 5 | 8,000 |
| 5 → 6 | 15,500 |
| 6 → 7 | 25,000 |
| 7 → 8 | 30,800 |
| 8 → 9 | 37,000 |
| 9 → 10 | 43,740 |
| 10 → 11 | 50,940 |
| 11 → 12 | 58,640 |
| 12 → 13 | 66,750 |
| 13 → 14 | 77,500 |
| 14 → 15 | 89,000 |
| 15 → 16 | 103,160 |
| 16 → 17 | 118,200 |
| 17 → 18 | 136,200 |
| 18 → 19 | 155,400 |
| 19 → 20 | 177,800 |
| 20 (Max) | N/A |
Death Penalties
Once you reach Knowledge Rank 5, dying becomes riskier. If you release to Base Camp, you’ll lose a portion of your accumulated knowledge EXP. At times, you might even drop down a Knowledge Rank if you’re close to the bottom of your current level. Avoid pressing “Return” right away. Instead, call out for a resurrection from other players. It’s common courtesy for groups to raise each other here, since everyone dreads losing those hard-earned ranks.
Pro Tip: Levels 1–4 do not suffer EXP loss on death. Explore fearlessly at first, and gather those teleport attunements without worry. After Rank 5, play more carefully to avoid needless penalties.
Stuck spending countless hours grinding your character’s levels in FFXIV and feeling burnt out? Yeah, I’ve been there too—leveling can be tedious and drain your energy fast. Luckily, our FFXIV Leveling Boost pairs you with expert players who quickly level your character, letting you dive into fun endgame content without wasting your valuable gaming time!
Phantom Jobs and Survival Skills
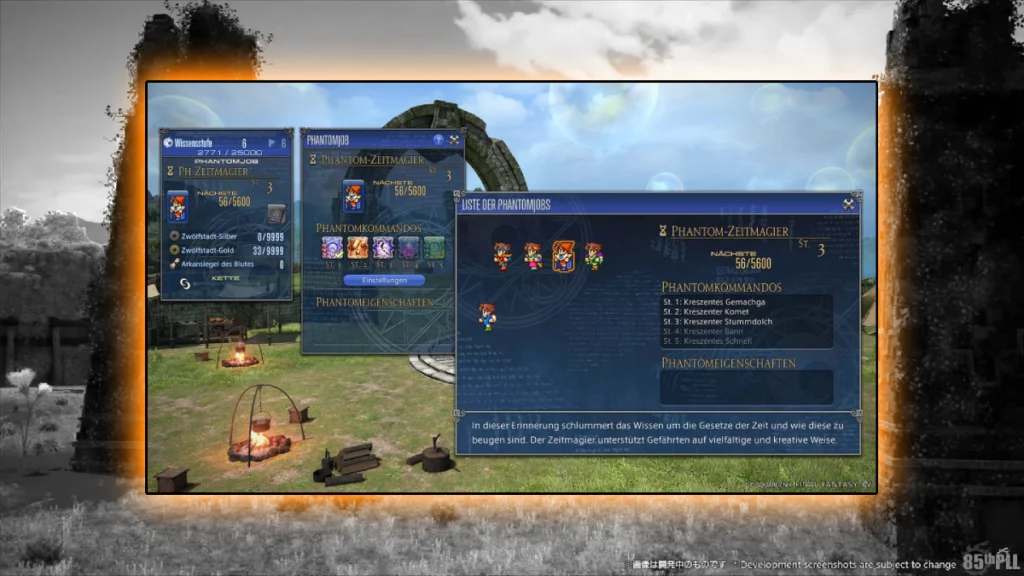
Phantom Jobs replace old systems like Lost or Logos Actions from previous field content. These mini-roles live alongside your main job and offer special abilities usable only within Occult Crescent. You unlock them through the quest “New Job, Old Tricks” and eventually can collect up to thirteen different phantom jobs.
How Phantom Jobs Work
Each phantom job grants a unique hotbar of actions, traits, and passives that boost your combat potential. Phantom Knight, for example, offers defensive abilities such as Phantom Guard or Pray (a protective buff). Phantom Monk focuses on heavy strikes and counterattacks, and Phantom Bard grants supportive songs to enhance your party.
You can equip five phantom actions at once on a dedicated hotbar. These actions level up in parallel to your Knowledge Rank. Most phantom jobs cap at level 6, where they unlock their strongest moves. Leveling them often unlocks Phantom Mastery, a passive that further increases your damage inside Occult Crescent.
Table: Examples of Phantom Jobs and Key Abilities
Focus on at least one phantom job that complements your main. Squishy ranged casters often pick Phantom Knight for extra defense. Tanks might choose Phantom Bard or Chemist to gain supportive skills. Healers who want more solo damage sometimes grab Monk or Samurai for powerful offense. Feel free to experiment.
Tired of slowly grinding levels for your alternate jobs in FFXIV and feeling like it’s never-ending? Trust me, leveling alts can really drain your motivation. But here’s an easy fix—our Alt Job Leveling Boost gets skilled players to quickly level your extra jobs, so you can spend less time grinding and more time enjoying high-level content!
Surviving as a Tank, Healer, or DPS
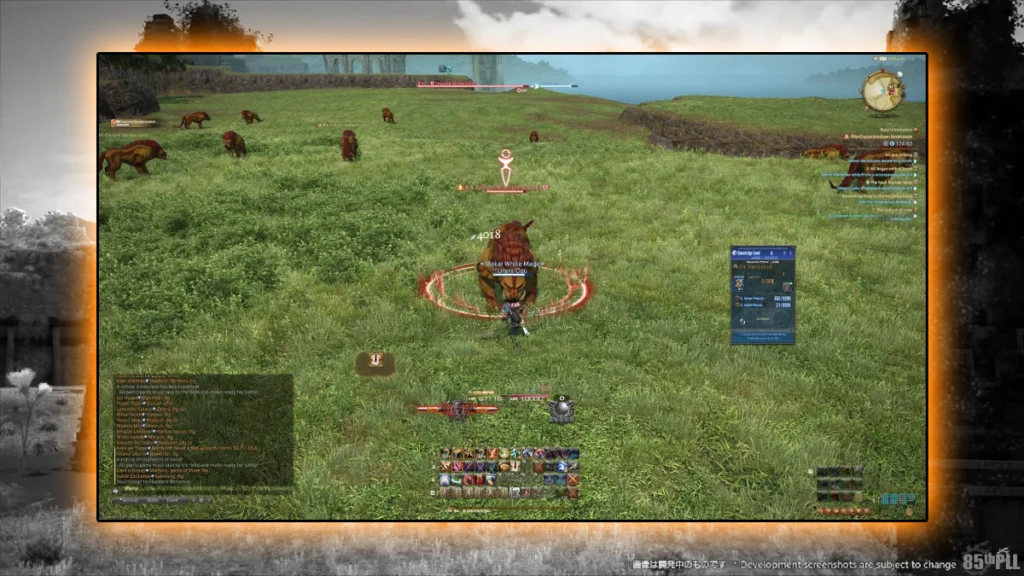
All roles face threats in Occult Crescent, so knowledge of your job’s strengths and weaknesses is crucial. Here are practical tips to stay alive:
Tank Survival Tips
Pull with Purpose: Take point and let monsters hit you first.
Manage Cooldowns: Cycle defensive abilities against tough mobs.
Assess Enemy Level: Even a tank folds if a mob outlevels you by 5+ ranks.
Phantom Knight or Time Mage: Use Guard or slow/freeze spells to reduce incoming damage.
Tanks can gather foes and face them away from party members. When a boss spawns, you help maintain a stable battlefield by managing aggro. Carry a few potions for emergencies, especially if the healer goes down.
Healer Survival Tips
Situational Awareness: Don’t fixate on HP bars so much that you miss an incoming attack.
Buff Up the Party: Tools like Protect or Shell significantly reduce damage.
Use Crowd Control: Abilities like Sleep or Repose buy time against multiple enemies.
Phantom Bard or Chemist: Consider a phantom job that adds damage or emergency heals.
Healers often feel responsible for everyone else, but remember to keep yourself safe first. It’s better to wait for a safer moment to resurrect a fallen ally than to risk a full wipe.
DPS Survival Tips
Choose Your Fights Wisely: Don’t charge a pack of enemies at once if you’re alone.
Stay Mobile: Many mobs have lethal AoEs that can flatten a fragile DPS in one shot.
Phantom Knight for Defense: Shield and self-heal can save squishy magic users.
Use Items: Carry potent healing potions, and keep gear repaired to maintain damage output.
Damage-dealers excel at burning foes quickly. Just don’t let your eagerness to dish out big numbers leave you vulnerable to a stray super-attack.
Struggling to beat Dragonsong’s Reprise (DSR) in FFXIV and tired of dealing with punishing raid mechanics? I’ve been in your shoes, and it’s tough—but there’s an easier way. With our FFXIV DSR Boost, skilled raiders handle the challenging fights, making sure you effortlessly get rare achievements and top-tier gear without all the frustration!
Teaming Up: Group Safety and EXP Bonuses

Solo play is possible, but grouping up often makes Occult Crescent more fun and efficient. Parties can hold up to eight players, though no standard tank-healer-DPS restrictions apply. The open world can accommodate dozens of players, so forming alliances is simple.
Forming Parties
Shout in the instance to find groups or join someone else’s. Many adventurers form “farm parties” to grind enemies and build high EXP chains. Knowledge Ranks that stay within three levels of each other enjoy special chain bonuses, leading to faster progression for everyone.
Coordinating as a Team
Move as a unit and kill mobs in a steady chain. Avoid splitting up or pulling different groups simultaneously. Use target markers to maintain focus. Communicate if you need time to heal or restore MP. Share helpful phantom job abilities, like a party shield from Phantom Knight or an AoE heal from Phantom Chemist.
Mitigating Death Penalties
Groups reduce the risk of losing knowledge EXP after level 5. If one member falls, others can resurrect them. Everyone appreciates that courtesy, so help each other out. Group synergy also helps in large events known as Critical Encounters, where dozens of players gather to battle formidable foes.
Stuck grinding through the endless Main Scenario Quests (MSQ) in FFXIV and feeling like you’ll never reach the exciting stuff? I totally understand—that story grind can really slow you down. Our MSQ Leveling Boost lets experienced players quickly tackle those tedious quests for you, so you can effortlessly jump into endgame adventures without wasting hours!
Avoiding One-Shot Deaths and Deadly Mobs
This zone earned its “survival” moniker for good reason. Powerful monsters roam the Crescent, and many can one-shot unsuspecting players. Smart tactics help you steer clear of frustration.
Check Levels: Don’t challenge monsters that exceed your Knowledge Rank by a wide margin.
Watch Aggro Types: Some enemies see you from afar, others react to sound or proximity. Learn their detection methods to slip by when you’re weak.
Pull Carefully: One or two enemies at a time is safer than dragging half a dungeon to your location.
Observe Mechanics: Many creatures have telegraphed attacks that deal massive damage. Dodge or mitigate them quickly.
Terrain Advantage: Line-of-sight corners and ledges to lose pursuing mobs. Jumping off a cliff can sometimes break aggro if you land safely.
Carry a Backup Plan: Keep a Phoenix Down or Reraise effect if possible. If you do end up on the floor, wait for a raise from others instead of hitting “Return.”

Critical Encounters: Big Risks, Big Rewards
Critical Encounters (CEs) are special high-profile boss FATEs that spawn periodically. Up to 72 players can join these events, which range from battling colossal creatures to defending a fortress from waves of mobs. Each CE typically has an entry phase. Stand in the indicated circle before the barrier closes, or you’ll get locked out.
Unique Mechanics and Loot
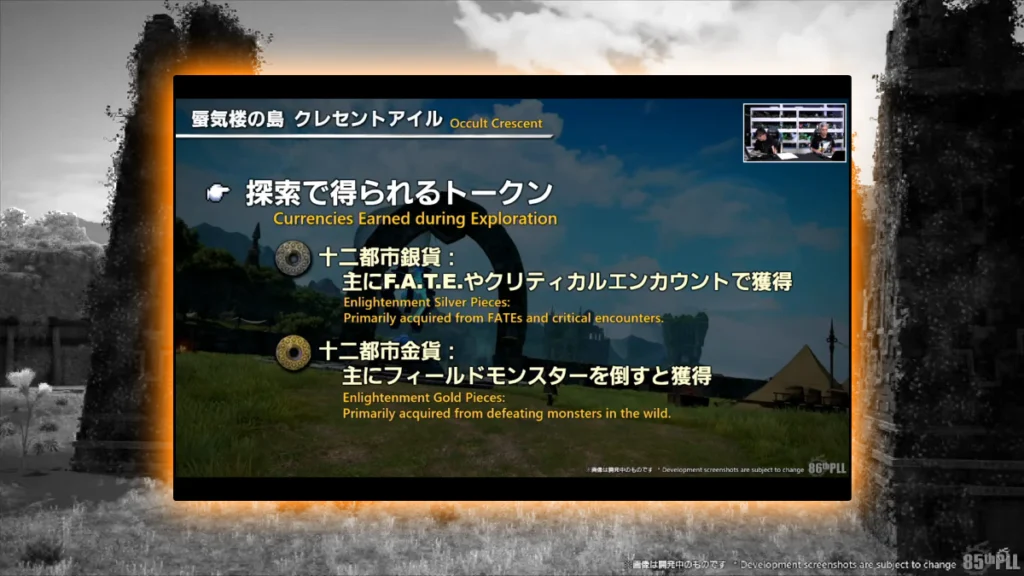
These events often feature multi-phase fights with heavy AoE patterns or add waves. Keep an eye on boss telegraphs and coordinate with tanks and healers. Surviving the entire encounter yields a hefty sum of knowledge EXP, plus Enlightenment currency for purchasing phantom job items or gear. Some phantom jobs only drop as loot from CEs, so consistent participation improves your odds of obtaining them.
Table: Critical Encounter Rewards Overview
| Reward Type | Purpose |
|---|---|
| Knowledge EXP | Increases your zone rank (essential for power) |
| Enlightenment Silver/Gold | Currency to buy gear, items, or soul shards |
| Phantom Job Soul Shards | Unlocks additional phantom job roles |
| Rare Loot (Mounts/Minions) | Collectibles and vanity items for your character |
| Misc. Items (Materia, Potions) | Useful resources to stay strong in the Crescent |
Tips for CEs
Avoid Overextending: Stay close to healers.
Watch for Red Markers: Group up or spread out, depending on the mechanic.
Don’t Release: Wait for a raise if you die, so you don’t lose any CE credit.
Get There Quickly: Unlock teleports so you can reach the CE zone before it starts.
Frustrated by wiping over and over in FFXIV’s brutally tough Omega Protocol (TOP) raid? Trust me, I’ve been there—it’s exhausting. Fortunately, our FFXIV TOP Boost connects you with skilled raiders who handle the toughest mechanics, letting you easily grab rare achievements and gear without the stress and frustration!
Learning from Mistakes: Common Pitfalls and Pro Tips
Everyone stumbles at some point, but recognizing mistakes helps you adapt:
Going Solo All the Time
Soloing is possible, but grouping speeds up leveling. Teamwork also reduces danger.Neglecting Phantom Jobs
Phantom skills drastically improve survival. Use them instead of ignoring the system.Forgetting Teleport Shards
Unlock every shard early so you can zip around and minimize risky travel.Instant “Return” on Death
Wait for a raise whenever possible to save your knowledge EXP after rank 5.Overconfidence
A level 10 knowledge player can still die to a level 18 mob. Scale your fights reasonably.Ignoring Specialized Gear
Some enemies deal specific elemental damage. Adjust your food or accessories if you’re consistently taking large hits from certain attacks.Skipping Regular FATEs
Non-critical FATEs still grant decent knowledge EXP. They can also spawn bigger events.Eating Avoidable AoEs
Many attacks are telegraphed. Dodge them by moving out of orange indicators or using personal defensive cooldowns.Underestimating Veteran Tips
Listen to players who share spawn timers, best grind spots, or optimized group strategies.Burning Out
You don’t have to rush rank 20. Spread out the grind and enjoy other game content to avoid frustration.

Conclusion
Occult Crescent: South Horn stands as a fierce yet rewarding playground for Patch 7.25 explorers. You’ve learned how to unlock the zone, navigate its diverse landscape, manage Knowledge Rank progression, and wield Phantom Jobs to your advantage. You also know the basics of surviving boss-like encounters and partying up with others to keep losses low and morale high. Approach this challenge with patience and courage, and you’ll soon conquer every corner of the island.
Be bold. Seek allies. Take calculated risks. Each success feels hard-earned, and every misstep provides a lesson for the future. Keep your potions stocked, your phantom job leveled, and your senses sharp. With determination, Occult Crescent’s toughest foes will become stepping stones on your path to mastery. Now grab your gear, form a party if you wish, and step into the unknown. Adventure awaits in the world of Final Fantasy XIV!