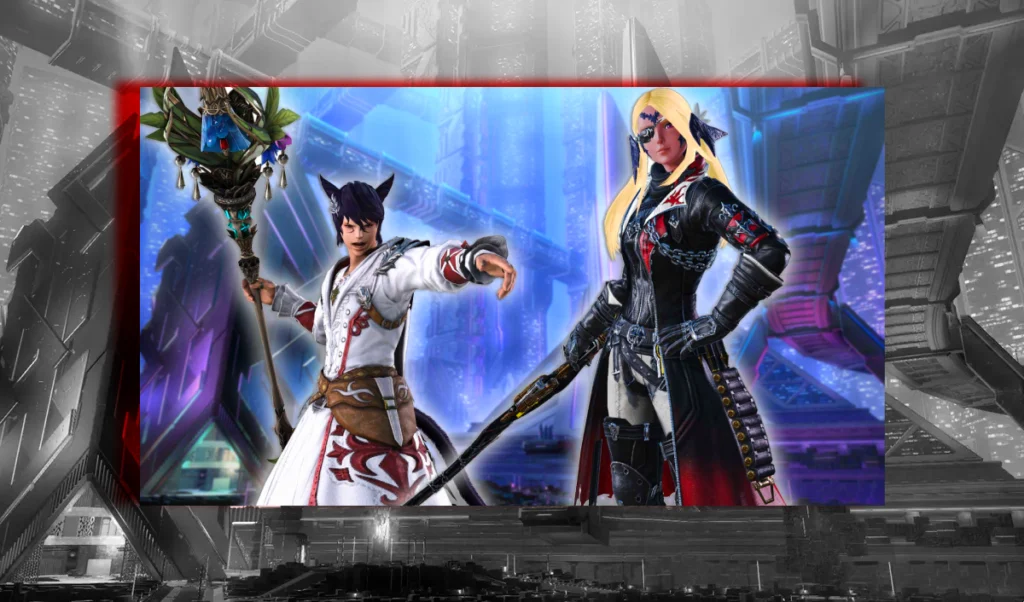
Welcome to our FFXIV DPS Tier List for Patch 7.1. If you’re a beginner ready to tackle Arcadion: Light-Heavyweight raids, you might be wondering which DPS jobs stand out in these fresh PvE encounters. Arcadion is the first raid tier of the Dawntrail expansion. It pits you against tournament-style boss fights in high-energy arenas filled with flashy mechanics and new challenges.
In these showdowns, dishing out strong damage (DPS) can mean the difference between victory and facing an enrage timer. Our guide ranks each DPS job from S tier to C tier, explains the logic behind each ranking, and helps you choose which job might suit your goals. Rest assured, every DPS job is viable when played with dedication. This list highlights how each one fares in Arcadion specifically. Ready to jump in?
Methodology & Tier Definitions

How We Built This Tier List
We collected data from FFLogs (Arcadion zone) to see how each DPS job performed in Arcadion encounters. This data gives us hard numbers on damage output (including “rDPS,” which considers a job’s personal damage plus the buffs provided to others).
Although logs are essential, numbers don’t tell the full story. We also scoured community feedback to see how players actually feel about each job. The final ranking takes into account raw damage, utility (like party buffs), and user-friendliness for beginners. Bear in mind that FFXIV balance is tight, so the difference between tiers can be subtle. A skilled player on a “lower-tier” job can outperform someone less practiced on a higher-tier job.
Tier Definitions at a Glance
S Tier (Outstanding): Jobs that top the DPS charts or bring exceptional value to a raid. Expect them to excel in Arcadion either through massive damage or powerful buffs.
A Tier (Great): These jobs perform extremely well in Arcadion. They might fall just shy of S-tier for damage or utility, but they remain reliable picks for both progression and farm runs.
B Tier (Good/Average): Jobs in this tier still hold their own. Their damage might be slightly lower than others due to balancing or extra utility, but they fit neatly into casual and midcore groups alike.
C Tier (Underpowered/Niche): Certain jobs currently lag in raw damage, or they demand extra effort to keep pace with higher-tier picks. These can still clear Arcadion, although the path may require more optimization.
(Remember: skill usually matters more than a tier rank. Play what you love, and you’ll often see better results than trying to force yourself into a job that doesn’t click.)
High-Level Tier Overview
Here’s a quick snapshot of where each DPS job lands for Patch 7.1 in Arcadion:
S Tier:
A Tier:
B Tier:
C Tier:
Next, let’s break down each job’s highlights, downsides, and overall role in Arcadion’s fast-paced matches.
Feel the rush of faster progression as our service handles the long grind and frees you to enjoy the real excitement of Eorzea. Discover how our FFXIV leveling boost tackles the time-consuming hurdles, unlocks rewarding in-game perks, and ultimately solves the hassle so you can dive into the true thrill of the adventure.
Detailed Job Analysis
Pictomancer (S Tier)
Overview
Pictomancer is the newest magical ranged DPS that splashed into Dawntrail and quickly climbed to the top. Its potent blend of heavy burst damage, flexible mobility, and helpful raid utility makes it a rockstar in Arcadion. Many Black Mage aficionados have switched to Pictomancer due to its impressive output and less punishing movement requirements.
Strengths
High burst potential with unique “painting” and aether brush spells.
Brings raid-wide damage buffs and a small party shield.
Flexible rotation that allows mobility without huge DPS losses.
Feels less punishing for mistakes compared to Black Mage.
Weaknesses
Lacks a raise spell (unlike Red Mage or Summoner).
Needs careful timing to land the biggest hits.
Has more resource management than the ultra-simple Summoner.
As a brand-new job, it has fewer established guides.
Black Mage (S Tier)
Overview
Black Mage remains the king of raw spell damage. Although it has some of the game’s slowest casts, its spells hit with terrifying force when uninterrupted. In Arcadion, a Black Mage that fully masters boss mechanics can unleash tremendous numbers.
Strengths
Unrivaled single-target damage in optimal conditions.
Buffs in 7.1 (like an extra Ley Lines charge) improved overall mobility.
Stands out in AoE phases as well (Flare and Freeze options).
Straightforward rotation pattern, once memorized, delivers top-tier results.
Weaknesses
Zero group utility (no buffs or raises).
Requires staying still for long casts, which is extra tough in movement-heavy raids.
Dropping Enochian or breaking a cast can crush your damage potential.
Not the most beginner-friendly job for raiding.
Dragoon (A Tier)
Overview
Dragoon is a melee DPS known for graceful jump attacks and a critical-hit raid buff. Thanks to recent potency tweaks, Dragoon now hits even harder. Its mix of party synergy and personal power places it comfortably in A tier.
Strengths
High burst via Nastrond, Stardiver, and life-of-the-dragoon combos.
Battle Litany offers a party-wide crit rate boost, a valuable offensive tool.
Sturdy DPS gear and self-healing with Life Surge.
Straightforward to learn in early levels.
Weaknesses
Jump attacks can lock you in place. A mistimed jump = faceplant.
Some positionals to maintain.
Primarily an offensive buffer, with little defensive aid for the team.
Missing combos or letting Power Surge drop hurts your DPS flow.
Monk (A Tier)

Overview
Monk relies on fast, sustained damage and fluid combos. Although it doesn’t buff raid DPS directly, it brings a powerful healing boost (Mantra) and is known for its lightning-fast punches.
Strengths
Blistering sustained DPS thanks to speedy weapon skills.
Easily keeps uptime with mobility tools like Thunderclap.
Unique utility: Mantra boosts healing for the entire party.
Rotation has become more streamlined after recent expansions.
Weaknesses
Maintains some positionals that might challenge newcomers.
Burst phases aren’t as explosive as other melee jobs.
Learning to manage high-speed combos can be overwhelming at first.
Lacks a party damage buff like Ninja’s Trick Attack.
Samurai (A Tier)
Overview
Samurai focuses on selfish, single-target damage. It provides no group buffs, but it packs some of the highest personal DPS in Arcadion. That trade-off has made it a star for players who want to see big crit numbers.
Strengths
Overwhelmingly strong finisher moves like Midare Setsugekka and Ogi Namikiri.
A straightforward goal: maximize personal DPS without worrying about party synergy.
Has a modest self-heal (Merciful Eyes) and damage reduction (Third Eye).
Rewarding to master, especially once you refine your burst timings.
Weaknesses
No group buffs at all.
Little room to assist in emergencies.
Punishes mistakes if you drop your DoT or overcap resources.
Doesn’t “share” damage buffs the way Dragoon or Ninja might.
Viper (A Tier)
Overview
Viper is the new “dual-blade melee” that wields two short swords or merges them into one. It’s similar to Samurai in that it’s largely a selfish DPS with minimal support. Logs show it matching Samurai in many encounters.
Strengths
Top-tier personal DPS, on par with Samurai when played well.
Fun and flashy combos involving blade stances.
High mobility for a melee, plus quick attacks.
Brand-new visuals and animations, which many players find fresh.
Weaknesses
Zero direct raid buffs or utility.
Complex stance swapping can be punishing for beginners.
No strong defensive cooldown like Reaper’s Arcane Crest.
Fewer community guides since it’s a newer job.
Ninja (A Tier)

Overview
Ninja specializes in high burst windows every minute and offers a huge party DPS gain through Trick Attack (now Mug). While its personal DPS can look middling, the overall contribution to the raid is massive.
Strengths
5% damage-taken debuff (Mug) is a huge boon for the entire party.
Burst combos with mudras (Ten-Chi-Jin) can deal serious damage.
Fantastic mobility with Shukuchi (teleport).
Helps manage aggro with Smoke Screen and Shadewalker.
Weaknesses
Lower personal DPS outside of burst, to offset its party buff.
Mudra inputs can be flubbed in chaotic mechanics.
No direct party-wide defense or healing.
Requires careful alignment with raid buff windows.
Reaper (A Tier)

Overview
Reaper joined in Endwalker and quickly became a fan favorite. It delivers a mix of big burst and decent team support (Arcane Circle). Although it might not spike as high as Samurai in damage, it’s a reliable choice for progression.
Strengths
Straightforward rotation, easy to pick up for new raiders.
Enshroud mode unleashes a chain of powerful attacks.
Arcane Circle provides a small party damage buff and triggers a small heal.
Self-shield and a follow-up party heal via Arcane Crest.
Weaknesses
Not as much top-end DPS as Samurai or Viper.
Manages Soul and Shroud gauges—mistiming them can hurt.
Lacks stand-out utility aside from its 3% damage buff.
No raise, no large defensive cooldown for allies.
Red Mage (B Tier)
Overview
Red Mage is the most versatile of casters, offering emergency raises, minor healing, and moderate damage. After some potency buffs, it still sits behind Black Mage or Pictomancer for raw damage, but it helps keep your raid alive.
Strengths
Dualcast mechanic makes half your spells instant, aiding movement.
Swiftcast Verraise can save runs by quickly resurrecting fallen allies.
Simple rotation that’s beginner-friendly.
Manafication provides decent burst every two minutes.
Weaknesses
Lower personal DPS, even with recent buffs.
Rotation can feel repetitive (Jolt → big spell → repeat).
Lacks a persistent party buff (Embolden now mostly self-only).
Smaller AoE potential if Arcadion has multi-target phases.
Bard (B Tier)
Overview
Bard is the classic support-oriented ranged DPS. Its songs buff the party’s damage, crit, and direct hit. Personal DPS tends to be lower, but the overall contribution can be surprisingly high when you factor in its buffs.
Strengths
Song-based buffs that ramp up your team’s DPS.
Strong utility via Troubadour, Battle Voice, and Nature’s Minne.
Mobility is excellent since most skills are instant.
Great for handling mechanics that require quick movement.
Weaknesses
Lower personal damage (the “ranged tax”).
RNG-based procs can cause inconsistent DPS.
Must keep DoTs up with Iron Jaws or lose a big chunk of damage.
No huge personal burst ability, since Bard’s power is spread out over songs.
Machinist (B Tier)

Overview
Machinist is the “selfish” physical ranged DPS, focusing on its own high burst while lacking direct party buffs. It had potency boosts in 7.1 that pushed it closer to where a “selfish ranged” should be.
Strengths
Wildfire burst window dishes out massive damage if timed perfectly.
Fairly static rotation (low RNG), so you always know your next move.
Uses Tactician for minor team-wide mitigation, plus Dismantle for boss damage reduction.
Summoning the Automaton Queen is visually cool and adds extra hits.
Weaknesses
Lacks group damage buffs like Bard or Dancer.
If forced out of Wildfire at the wrong moment, DPS plummets.
Burst window is fast and hectic—high ping or missed inputs can hurt a lot.
Rotation outside of burst can feel empty or repetitive.
Dancer (B Tier)
Overview
Dancer is the ultimate party-buffing ranged job. Its single-target DPS might look weak, but Dance Partner grants a massive damage boost to whichever ally it targets. Many groups love having a Dancer around for synergy.
Strengths
Dance Partner can offer +5% damage plus big crit/direct hit buffs in your Technical Step window.
Excellent utility: Shield Samba, Curing Waltz, Improvisation.
Simple rotation with easy combos, which helps you focus on raid mechanics.
Incredible mobility—your GCDs are mostly instant, and you can move freely.
Weaknesses
Very low personal DPS to compensate for the huge ally buffs.
Loses potency if your Dance Partner dies or disconnects.
Damage is reliant on hitting those 2-minute buffs perfectly.
Offers less satisfaction to players who love seeing their own giant crits.
Summoner (C Tier)
Overview
Summoner is the most straightforward caster, yet it currently holds the lowest damage potential in Arcadion. The rotation is almost fully instant-cast, which makes it beginner-friendly. In practice, Summoner still clears content just fine, but the numbers do lag.
Strengths
Extremely easy rotation. Simply cycle through elemental summons and unleash Bahamut or Phoenix bursts.
Has a built-in raise (Rez) and small heals from Phoenix.
Massive mobility—barely any cast times to worry about.
Perfect for new players who want to learn mechanics without juggling a complex rotation.
Weaknesses
Lowest personal DPS in current logs.
The rotation, while easy, can feel monotonous for advanced players.
Lacks a strong group buff (only a small 3% from Searing Light).
May feel underpowered if you’re chasing top parses.
FFLogs Data vs. Community Opinions
The damage logs clearly show Pictomancer and Black Mage at the top of Arcadion parsing. Meanwhile, Summoner and Red Mage trend near the bottom for raw damage. However, player discussions often highlight other factors like:
Party buffs: Bard, Dancer, and Ninja contribute a lot of hidden raid DPS despite lower personal hits.
Raise utility: Red Mage and Summoner save many parties that would otherwise wipe.
Balance among melee: Dragoon, Monk, Samurai, Viper, Ninja, and Reaper all perform closely.
Casual vs. hardcore: Some jobs are easier to play well, others have high ceilings but punish mistakes.
In short, logs give raw numbers, but player feedback explains which jobs feel smoother or more rewarding. Many veterans advise picking the job that clicks with you rather than obsessing over the top parse.
Essential Tips: Gear, Gil, and Party Synergy

1. Gearing Up
Grab tokens from Arcadion Normal each week to trade for gear.
Use Allagan Tomestones to buy strong tome gear.
Consider crafted gear (melded with materia) when entering savage content.
Always keep your gear updated and use stat food in raids. Even a small 10% stat boost helps.
2. Managing Your Gil
Daily roulettes and the Challenge Log grant steady gil.
Run Treasure Maps for valuable crafting mats.
Craft or gather items that raiders want (food, potions, glam materials).
Sell any extra loot, minions, or materia you don’t need.
Be mindful of spending—save gil for raid consumables and repairs.
3. Maximizing Synergy
Aim for a balanced party with 2 melee, 1 ranged (phys), and 1 caster if possible.
Align your burst windows at 2-minute intervals so all buffs stack.
Use your mitigation when heavy AoEs strike (Troubadour, Shield Samba, etc.).
Coordinate and stay positive—nothing wrecks synergy more than poor morale.
Pros & Cons Tables at a Glance
Below are quick-reference tables outlining each job’s top advantages and drawbacks. Use these summaries to compare potential picks at a glance.
Melee Jobs
| Job | Pros | Cons |
|---|---|---|
| Dragoon | + Strong burst (Nastrond/Stardiver) + Party crit buff (Litany) + Good durability + Fairly direct combo system | – Animation lock on jumps – Positional combos – Primarily offensive buffs – Rotation can desync if mismanaged |
| Monk | + Extremely fast GCD + High sustained DPS + Mantra heals + Great mobility (Thunderclap) | – Complex combos at high speed – Less explosive burst – Some positionals remain – Lacks large party damage buff |
| Samurai | + Top-tier personal damage + Straightforward goal: big hits + Minor self-heals (Merciful/Third Eye) + Very rewarding when mastered | – No group utility – Harsh if you drop rotation – No quick way to help others – Must align bursts carefully |
| Viper | + Comparable damage to SAM + Fast and flashy dual-blade combos + Excellent movement for a melee + Brand-new animations | – 0 raid buffs or utility – Stance swaps can be punishing – No big defensive cooldown – Fewer community resources |
| Ninja | + Trick Attack/Mug = 5% party DPS gain + High burst with mudra combos + Extremely mobile (Shukuchi) + Can assist with enmity | – Lower personal DPS outside bursts – Mudra mistakes cost damage – No defensive group buff – Rotation requires precise timing |
| Reaper | + Easy to learn, solid damage + Enshroud for big burst phases + Arcane Circle party buff & small heal + Self shield from Arcane Crest | – Slightly behind pure DPS melees – Needs gauge management – Lacks major support beyond Circle – Straightforward rotation might feel formulaic |
Ranged Physical Jobs
| Job | Pros | Cons |
|---|---|---|
| Bard | + Party-wide buffs through songs + Great mobility + Defensive boost (Troubadour) + Easy handling of mechanics | – Lower personal damage – RNG-based procs affect flow – Must maintain DoTs – Burst is less pronounced |
| Machinist | + High personal burst with Wildfire + Straightforward rotation + Tactician + Dismantle for minor utility + Recently buffed potencies | – No ally damage buffs – Burst window easily disrupted – Hectic weaving under Wildfire – Lacks healing or synergy tools |
| Dancer | + Strongest ally buffs (Dance Partner) + Good defensive cooldowns (Shield Samba) + Easiest rotation among ranged + Excellent mobility for mechanics | – Very low personal DPS – Highly reliant on a good dance partner – Damage spikes revolve around Tech Step – Partner death = big utility drop |
Magical Caster Jobs
| Job | Pros | Cons |
|---|---|---|
| Black Mage | + Highest potential damage + Big AoE and single-target hits + Double Ley Lines boost mobility + Rotation can be mastered for huge parses | – No group utility or raise – Must stand still for big casts – Steep learning curve – Movement disrupts Enochian/damage |
| Pictomancer | + Massive burst with “painting” spells + Handy party buffs + shield + Flexible rotation with good mobility + Easier to handle than BLM in movement | – No rez spell – Requires resource management – Some combos with long cast times – New job, so fewer references |
| Red Mage | + Dualcast = half your spells are instant + Swiftcast Verraise to save runs + Simple rotation for beginners + Minor defensive utility (Magick Barrier) | – Lower personal DPS than S-tier casters – Rotation can feel repetitive – No large permanent party buff – Weaker AoE potential |
| Summoner | + Super easy rotation (mostly instant) + Can rez allies like RDM + Phoenix heal for added support + Great for learning boss mechanics | – Lowest personal DPS – Rotation can feel dull at high skill – Small 3% team buff only – Lacks big personal defensive options |
Step-by-Step: Choosing the Right DPS

Still not sure which DPS job to pick? Consider these steps:
Melee vs. Ranged vs. Caster: Think about whether you prefer up-close combat or attacking from afar.
Simplicity vs. Complexity: Decide if you’d rather ease into raiding with a simpler rotation (Summoner, Red Mage, Dancer) or challenge yourself early (Black Mage, Ninja, Monk).
Utility vs. Personal DPS: Ask how much you want to support your party. Jobs like Bard, Dancer, Red Mage, and Summoner excel at team assistance. Samurai and Machinist focus on pure damage.
Aesthetics & Theme: Choose what resonates with you. Swords, guns, paintbrushes, big spells—your enjoyment often leads to better mastery.
Long-Term Goals: If you plan to tackle harder modes (Savage, Ultimate), factor in each job’s complexity and synergy.
Test Them Out: Use practice dummies, do some normal raids, or hop into a casual learning party. Nothing beats hands-on experience.
Unlock new heights in Eorzea with a tailored push that conquers tedious progression and frees your time for real adventures. Our FFXIV FRU boost cuts through the slow grind, ensuring you savor every triumph along the way.
Community Strategies & Extra Insights
Learn Your Opener: Every DPS job has an optimal opener for maximum burst. Practicing that opener until it becomes second nature is a huge DPS gain.
Practice on Dummies: Stone, Sky, Sea allows you to measure how quickly you can burn a training dummy. If you meet or beat the time threshold, your damage is likely good enough for that Arcadion encounter.
Optimize Downtime: If a boss goes untargetable, prepare bursts or reapply DoTs just before it disappears. Those tiny details add up over a fight.
Party Finder Etiquette: Mark your role accurately, bring consumables, and communicate. Show willingness to learn, and you’ll be more likely to succeed even in pickup groups.
Keybinding & UI: Good hotbar layouts prevent fumbling. Keep important cooldowns together, watch focus target for boss casts, and ensure your GCD spells feel comfortable under your fingers.
Stay Positive: Wipes happen. Many raids fall apart because of morale rather than actual difficulty. Encourage teammates, share small tips, and learn from each attempt.
FAQ: Quick Questions, Fast Answers
Q: What’s the easiest DPS for beginners?
A: Summoner or Red Mage. Both have straightforward rotations and access to Raise, which adds a safety net if someone drops mid-fight. Dancer is another simple option if you like the ranged physical role.
Q: Which DPS has the highest potential in Arcadion Savage?
A: In pure damage, Pictomancer and Black Mage top the charts. Samurai and Viper also bring very high personal DPS among melee. Machinist claims the highest personal DPS for physical ranged (but lacks support). Always remember: a dead Black Mage does zero DPS!
Q: Do we need a Bard or Dancer for Arcadion?
A: It’s helpful but not required. Most groups prefer having at least one supportive ranged, though you can succeed without it if your group’s personal DPS is strong and everyone knows the fight.
Q: Do I need expensive consumables for normal Arcadion?
A: Food is highly recommended even in normal mode. Potions (Tinctures) are more crucial in savage. If you’re pushing close to enrage or want to maximize DPS windows, go ahead and pop a pot.
Q: How do I raise my overall DPS?
A: Practice your rotation until you can do it seamlessly. Maintain boss uptime by limiting unnecessary movement. Use cooldowns on schedule instead of saving them too long. Improve gear and melds. Ask for feedback from experienced players if possible.
Q: Can Summoner or Red Mage solo older content or specialized challenges?
A: Yes. Both excel at solo endeavors because they can heal themselves and raise if needed. Melees sometimes manage it too, but having a self-heal plus Rez gives RDM/SMN a big advantage.
Q: Is a static required for Arcadion Savage?
A: Not necessarily. Many players clear via Party Finder. A static helps with consistency, but it’s entirely possible to progress by joining groups in the party-matching system, as long as you stay patient and persistent.
Conclusion
Congratulations on making it to the end of this guide! You’ve seen how each DPS job performs in Arcadion: Light-Heavyweight for Patch 7.1. Although we rank them from S to C, every job can clear content if you invest the time to master it.
Arcadion may feel intimidating when you’re new, but raiding in FFXIV is about continuous improvement, teamwork, and fun. No one starts as an expert. Everyone wipes while learning to dodge mechanics or align cooldowns. Keep a positive attitude, communicate with your party, and learn something from each pull.
Remember these final tips:
Gear up, meld your materia, and eat food.
Practice openers and watch how you time bursts with your team.
Pick a job that you love. True passion leads to better performance.
No single job is so weak that it can’t succeed, and none is so strong that it dominates all content alone. The best job is the one you enjoy enough to play well. Arcadion wants you to step into the arena with confidence, so follow your gut and choose the style that makes you smile. You’ll conquer those bosses in no time!
Good luck in Patch 7.1, and may your clears be swift and your loot chests bountiful. Now go out there, pick your favorite DPS, and shine under the Arcadion spotlight—your epic journey awaits!